Introduction
ZoodPay wants to provide its payment solution to every online business who may be interested in it. ZoodPay API v0 is the latest version which offers our latest features.
Please contact to our account manager who helps you to create a ZoodPay account. Please collect the Sandbox and Production keys to start the integration process.
Merchant Guideline
API Environments
Please check API Environments as mentioned below:
Production
https://api.zoodpay.com
Sandbox
https://sandbox-api.zoodpay.com
ZoodPay Service Models
ZoodPay offers their merchants a choice of two different service models.
1. ZoodPay Installment (ZPI)
This service model completes the payment approval, starts the consumer's payment plan (installments), and settles the order value with the merchant's nominated bank account.
2. Pay After Delivery (PAD)
This service model completes the payment approval after delivery and starts the consumer's payment plan. It will settle the order value with the merchant's nominated bank account based on delivered items amount.
Integration Flow
Direct Payment Flow
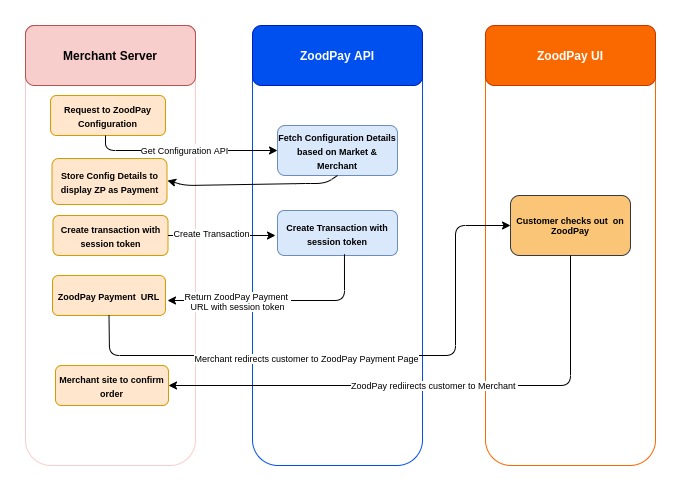
- Merchant calls the Get Configuration endpoint to retrieve Zoodpay order limits, possibly as part of an asynchronous scheduled background process.
- Merchant stores these minimum and maximum order values server-side.
- Separately, at the checkout, Merchant uses the stored Zoodpay minimum and maximum order values to determine if Zoodpay should be presented as an available payment method.
- Merchant calls the Create Transaction endpoint to retrieve ZoodPay payment URL and session token.
- Merchant uses the token in combination with the Payment URL to direct the consumer through the ZoodPay payment screenflow.
- Consumer completes the Zoodpay screenflow and is returned to the Merchant website.
- If the Consumer clicks "confirm", they will be returned to the Merchant website with the transaction id and a status of "SUCCESS".
- If the Consumer cancels, they will be returned to the Merchant website with the transaction id and a status of "CANCELLED".
- If there is an issue with Consumer Card, they will be returned to the Merchant website with the transaction id and a status of "FAILED".
API Architecture
REST
The ZoodPay API is organised around REST. The API attempts to use predictable, resource-oriented URLs and to use HTTP status codes to indicate errors.
HTTPS
The ZoodPay API requires all communications to be secured using TLS 1.2 or greater.
Request Headers
Clients must send appropriate headers with all requests.
HTTP Headers
| Field Name | Requirement | Description |
|---|---|---|
| Authorization | required | See Authentication |
| Content Type | required | All POST and PUT requests must declare the content-type as application/json. |
| Accept | recommended. | All requests must accept application/json or */* |
Authentication
ZoodPay API uses Basic HTTP Authentication, a simple authentication scheme as explained below and specified by RFC 7617
All API endpoints require this form of authentication except Healthcheck On wrong/incorrect authentication API request will result into "401 Unauthorised" response.
For Example
| Merchant Key | Secret Key |
|---|---|
| merchant | secret |
**Note
In conventional HTTP terms, "Merchant ID" is the username and "Secret Key" is the password.
How to create basic auth?
| Plain Text | Base64 Encoded |
|---|---|
| merchant:secret | bWVyY2hhbnQ6c2VjcmV0 |
The Authorization header can then be formed by including the word Basic, followed by a single space character, followed by the base64-encoded credential pair.
| Final Header |
|---|
| Authorization: Basic bWVyY2hhbnQ6c2VjcmV0 |
Healtcheck
This endpoint can be used to check whether ZoodPay service is available and reachable.
                GET https://{environment}.zoodpay.com/healthcheck

                curl --request GET \
                --url https://sandbox-api.zoodpay.com/healthcheck \
                --header 'content-type: application/json'
Signature/Checksum Generation Logic
Merchant Logic to create Signature
Merchant will use the sha512 to create the signature. Fields will be used as mentioned :
                string = merchant_key|merchant_reference_no|amount|currency|market_code|salt

                signature = sha512(string)
Note: Each field will be separated by delimiter "|".
Merchant will send the signature in request payload to ZoodPay. Zoodpay will validate the signature and will return error Checksum provided is invalid if signature is invalid.
ZoodPay Logic to create Signature
ZoodPay will use the sha512 to create the signature. Fields will be used in reverse order as mentioned :
                string = market_code|currency|amount|merchant_reference_no|merchant_key|transaction_id|salt

                signature = sha512(string)
It will send in response payload to Merchant. Merchant will validate the signature and update transaction status accordingly if signature is invalid. Or they can also use our Get Transaction Status API to check the status of transaction.
Note: Salt will be provided at the time of account creation.
Zoodpay Logic to create Signature for refund callback
ZoodPay will use the sha512 to create the signature. Fields will be used as mentioned :
                string = merchant_refund_reference|refund_amount|status|merchant_key|refund_id|salt

                signature = sha512(string)
Note: Each field will be separated by delimiter "|".
Zoodpay will send the signature in refund callback request payload to Merchant. Merchant will validate the signature and update refund status accordingly if signature is invalid.
Data Models Description
1. Get Configuration Method
a. Request Payload Data Model
| Field Name | Field Type | Description |
|---|---|---|
| market_code | string required | The ISO 3166-1 country code. Length should be 2 or 3 characters. Possible values are "KZ", "UZ", "IQ", "JO", "KSA", "KW", "LB" |
b. Response Payload Data Model
| Field Name | Field Type | Description |
|---|---|---|
| configuration | Configuration[] | An array of ZoodPay Services configurations |
c. Configuration Data Model
| Field Name | Field Type | Description |
|---|---|---|
| min_limit | decimal | Minimum limit of service for merchant. |
| max_limit | decimal | Maximum limit of service for merchant. |
| service_name | string | Service Name. |
| description | string | Description of the service in merchant preferred language |
| service_code | string | ZoodPay Service Code. Short form of payment type “ZPI” & “PAD” |
| instalments | integer | Total Instalment Number |
2. Create Transaction Method
a. Request Payload Data Model
| Field Name | Field Type | Description |
|---|---|---|
| customer | Customer required | Customer detail object who placed the order at Merchant shop. |
| order | Order required | Merchant's order object. |
| items | Items[] required | An array of order items. |
| billing | Contact | The consumer's billing address. |
| shipping | Contact required | The consumer's shipping address. |
| shipping_service | ShippingService | The customer's shipping service. |
b. Response Payload Data Model
| Field Name | Field Type | Description |
|---|---|---|
| transaction_id | string | ZoodPay Transaction ID which will be used in subsequent API calls related to transaction and refunds. |
| session_token | string | Session token to be used to complete payment. Please note that there is no use of this field and has been reserved for future use cases. |
| expiry_time | integer | A UTC timestamp of the session token, in ISO 8601 format. It gives information when token will be expired. |
| payment_url | string | A URL that can be used to redirect the customer to ZoodPay screenflow directly from the merchant backend. |
| signature | string | Merchant should validate the parameter values by verifying the signature/checksum comes in the response before confirmation of the transaction at their end. It ensures that parameter values not tempered. Signature string can be verified by using ZoodPay checksum algorithm. |
c. Customer Data Model
| Field Name | Field Type | Description |
|---|---|---|
| first_name | string required | Customer’s first name. Length should be between 3 to 50 characters. |
| last_name | string | Customer’s last name. Length should be less than 50 characters |
| customer_email | string | Customer’s email address. Length should be less than 128 characters |
| customer_phone | string required | Customer’s phone number. Length should be less than 32 characters (international format). |
| customer_dob | string | Customer’s date of birth. Date format should be YYYY-mm-dd |
| customer_pid | string | Customer’s personal identification number. Length should be 12 characters and 9 characters for KZ and UZ market respectively. |
d. Order Data Model
| Field Name | Field Type | Description |
|---|---|---|
| service_code | string required | ZoodPay Service Code. Short form of ZoodPay payment type. Supported values “ZPI“ and “PAD“ received from Configuration API. |
| amount | decimal required | Order amount is a final amount in a decimal number, rounded to 2 decimal places. |
| currency | string required | The currency in ISO-4217 format. Supported values include "KZT", “UZS“, "IQD", "JOD", "SAR", "KWD", "LBP" for market code "KZ", "UZ", "IQ", "JO", "KSA", "KW", "LB" respectively. The value provided must correspond to the local currency of the market code. |
| market_code | string required | The ISO 3166-1 country code. Length should be 2 or 3 characters. Possible values are "KZ", "UZ", "IQ", "JO", "KSA", "KW", "LB". |
| merchant_reference_no | string required | The merchant's unique order id/reference associated to this transaction. |
| signature | string required | ZoodPay validates the request and ensures that paramteres are not tempered by verifying the signature in the request. For creating the checksum (signature) refer to the steps given in Checksum logic. Note: Create the signature using the body parameter of the request along with the salt key. |
| lang | string | Customer language according to market code. Supported values include “en“, “ru“, “uz“, “kk“, “ar“, “ku“. Default value will be “en”. |
| discount_amount | decimal | Order discount amount in a decimal number, rounded to 2 decimal places. |
| shipping_amount | decimal | Order shipping amount in a decimal number, rounded to 2 decimal places. |
| tax_amount | decimal | Order tax amount if any in a decimal number, rounded to 2 decimal places. |
e. Item Data Model
| Field Name | Field Type | Description |
|---|---|---|
| name | string required | Item name. Length should be less than 255 characters. |
| sku | string | Item SKU. Length should be less than 64 characters. |
| quantity | integer required | The quantity of the item, stored as a integer. Should be greater than 0. |
| price | decimal required | Item price in a decimal number, rounded to 2 decimal places. |
| discount_amount | decimal | Item discount amount in a decimal number, rounded to 2 decimal places. |
| tax_amount | decimal | Order tax amount if any in a decimal number, rounded to 2 decimal places. |
| currency_code | decimal | The currency in ISO-4217 format. Supported values include "KZT", “UZS“, "IQD", "JOD", "SAR", "KWD", "LBP" for market code "KZ", "UZ", "IQ", "JO", "KSA", "KW", "LB" respectively. The value provided must correspond to the local currency of the market code. |
| categories | [] [] string required | An array of arrays to accommodate multiple categories that apply to the item. Each array represents a hierarchical path to a category (category name), with the left-most category being the top-level parent category. |
f. Contact Data Model
| Field Name | Field Type | Description |
|---|---|---|
| name | string required | Full Name. Length should be less than 255 characters. |
| address_line1 | string required | First line of the address. Length should be less than 128 characters. |
| address_line2 | string | Second line of the address. Length should be less than 128 characters. |
| city | string | City of address. Length should be less than 100 characters. |
| state | string | State of address. Length should be less than 100 characters. |
| zipcode | string required | ZIP or Postal Code. Length should be less than 64 characters. |
| country_code | string required | The ISO 3166-1 country code. Length should be 2 or 3 characters. |
| phone_number | string | The phone number, in E.123 format. Length up to 32 characters. |
g. Shipping Service Data Model
| Field Name | Field Type | Description |
|---|---|---|
| name | string | The name of the shipping service/provider. Length should be less than 128 characters. |
| shipped_at | string | The date and time when the order was shipped, in ISO 8601 format. Please note that this is not mandatory field during create transaction. |
| tracking | string | The tracking number provided by the courier. Length should be less than 128 characters. Please note that this is not mandatory field during create transaction. |
| priority | string | The shipping priority. If provided, must be either "STANDARD" or "EXPRESS". |
3. Create Refund Method
a. Request Payload Data Model
| Field Name | Field Type | Description |
|---|---|---|
| transaction_id | string required | The unique ZoodPay Transaction ID to create refund. |
| refund_amount | decimal required | The refund amount should not greater than transaction amount or sum of multiple refund amounts should not exceed transaction amount. |
| reason | string required | The merchant’s reason to create the refund. |
| request_id | string | A unique Request ID, required for safe retries. It is recommended that the merchant generate a UUID for each unique refund. |
| merchant_refund_reference | string | The merchant's corresponding refund ID or reference, required for safe retries. |
b. Response Payload Data Model
| Field Name | Field Type | Description |
|---|---|---|
| refund_id | string | The unique ZoodPay Refund ID. |
| refund | Refund | ZoodPay Refund object. |
c. Refund Data Model
| Field Name | Field Type | Description |
|---|---|---|
| refund_id | string | The unique ZoodPay Refund ID. |
| refund_amount | decimal | The refund amount should not greater than transaction amount or sum of multiple refund amounts should not exceed transaction amount. |
| currency | string | Currency of refund amount. |
| transaction_id | string | The unique ZoodPay Transaction ID. |
| status | string | Refund status. Possible values are Initiated, Approved, Declined. |
| declined_reason | string | Refund decline reason need to be displayed if refund has been declined, otherwise it remains empty. |
| request_id | string | A unique Request ID, required for safe retries. It is recommended that the merchant generate a UUID for each unique refund. |
| merchant_refund_reference | string | The merchant's corresponding refund ID or reference, required for safe retries. This must be included along with the request_id to utilise idempotency. |
| created_at | string | A UTC timestamp of the refund creation time, in ISO 8601 format. |
| refunded_at | string | A UTC timestamp of the refunded time, in ISO 8601 format. |
4. Set Transaction Delivery Date
a. Request Payload Data Model
| Field Name | Field Type | Description |
|---|---|---|
| delivered_at | string required | The date and time when the order was shipped, in ISO 8601 format. |
| final_capture_amount | decimal | This field is for the future purposes and it is the final amount that needs to be debited from the customer. If zero or field does not exists in the payload then original amount of the transactions needs to be debited. |
b. Response Payload Data Model
| Field Name | Field Type | Description |
|---|---|---|
| transaction_id | string | ZoodPay Transaction ID which will be used in subsequent API calls related to transaction and refunds. |
| status | string | Transaction status. Possible values are Inactive, Paid, Pending, Failed and Cancelled. |
| original_amount | decimal | Original amount captured at the time of transaction creation. |
| final_capture_amount | decimal | Final amount that needs to be debited from the customer. |
| delivered_at | string | The date and time when the order was shipped, in ISO 8601 format. |
| sms_link | string | ZoodPay Delivery link to verify the OTP which was sent to customer mobile number via SMS.This key exists for sandbox environment only. |
| sms_otp | string | OTP which was sent to customer for the confirmation of delivery.This key exists for sandbox environment only. |
5. Response Data will be post by ZoodPay on Success/Error of Merchant page
HTTP Headers
| Field Name | Description |
|---|---|
| Content Type | application/x-www-form-urlencoded |
| Method | POST |
a. Request Payload Data Model
| Field Name | Field Type | Description |
|---|---|---|
| amount | decimal | Order final amount in a decimal number, rounded to 2 decimal places. |
| created_at | string | A UTC timestamp of the transaction creation time, in ISO 8601 format. |
| status | string | Transaction status. Possible values are Inactive, Paid, Pending, Failed and Cancelled. |
| transaction_id | string | ZoodPay Transaction ID which will be used in subsequent API calls related to transaction and refunds. |
| merchant_order_reference | string | The merchant's unique order id/reference associated to this transaction. |
| signature | string | Check the Checksum creation algorithm by ZoodPay , which will be sent to the merchant. |
6. Get Customer`s Credit Balance API
a. Request Payload Data Model
| Field Name | Field Type | Description |
|---|---|---|
| market_code | string required | The ISO 3166-1 country code. Length should be 2 or 3 characters. Possible values are "KZ", "UZ", "IQ", "JO", "KSA", "KW", "LB" |
| customer_mobile | string required | Customer’s mobile number. Length should be less than 32 characters. |
b. Response Payload Data Model
| Field Name | Field Type | Description |
|---|---|---|
| credit_balance | CreditBalance[] | An array of available credit balances service wise. |
c. CreditBalance Data Model
| Field Name | Field Type | Description |
|---|---|---|
| service_code | string | ZoodPay Service Code. Short form of payment type “ZPI”,“PAD” etc. |
| amount | decimal | Available credit limit for requested service. |
| currency | string | The currency for credit limit in ISO-4217 format. |
Callback API / Webhooks
1. Instant Payment Notification (IPN) Request Payload by ZoodPay on Merchant callback URL
HTTP Headers
| Field Name | Description |
|---|---|
| Content Type | application/json |
| Method | POST |
Example
                {
                  "amount": "200.00",
                  "created_at": "2020-09-22T11:23:55.432Z",
                  "status": "Paid",
                  "transaction_id": "5fd751239103c"
                  ”merchant_order_reference”: 12345
                  ”signature”: “98f6edca713f25495da17a806636101eca46501b080dc6f47fab85d1223a1”
                  }
a. Request Payload Data Model
| Field Name | Field Type | Description |
|---|---|---|
| amount | decimal | Order final amount in a decimal number, rounded to 2 decimal places. |
| created_at | string | A UTC timestamp of the transaction creation time, in ISO 8601 format. |
| status | string | Transaction status. Possible values are Inactive, Paid, Pending, Failed and Cancelled. |
| transaction_id | string | ZoodPay Transaction ID which will be used in subsequent API calls related to transaction and refunds. |
| merchant_order_reference | string | The merchant's unique order id/reference associated to this transaction. |
| signature | string | Check the Checksum creation algorithm by ZoodPay , which will be sent to the merchant. |
2. Refund Url Payload by ZoodPay on Merchant callback URL
HTTP Headers
| Field Name | Description |
|---|---|
| Content Type | application/json |
| Method | POST |
Example
                {
                  "refund": {
                    "created_at": "2020-12-10T10:48:44+00:00",
                    "currency": "KZT",
                    "declined_reason": "",
                    "merchant_refund_reference": "merch123",
                    "refund_amount": 10.00,
                    "refund_id": "5fd1fdc3f77d",
                    "refunded_at": "2021-01-10T23:00:00+00:00",
                    "request_id": "100",
                    "status": "Done",
                    "transaction_id": "5fd1eab5b1d71",
                  },
                  "signature": "b5b8a7a4b25e622ea7ab56e62ac8bb069f708"
                  "refund_id": "5fd1fd0c3f77d"
                }
a. Request Payload Data Model
| Field Name | Field Type | Description |
|---|---|---|
| refund_id | string | The unique ZoodPay Refund ID. |
| signature | string | Merchant should validate the parameter values by verifying the signature/checksum comes in the request. Signature string can be verified by using Zoodpay Refund Checksum logic. |
| refund | Refund | ZoodPay Refund object. |
API Simulator
Please click here it will be open in a new page
Platform Integration
WordPress Extension
This guide describes how to integrate ZoodPay into your WooCommerce website so that you can provide ZoodPay as a payment option for your customers. After integrating with ZoodPay, your WooCommerce site will:
- Offer ZoodPay as a payment option on the checkout page.
- Refund ZoodPay payments from your WooCommerce order management system.
Integration Steps
Required Steps Before Integration
- You should have a ZoodPay Merchant account.
- Please visit our Contact Page if you don’t have an account.
- Make sure you have the following details from ZoodPay.
- Merchant Key
- Merchant Secret
- Merchant Salt
- ZoodPay API URL
- Familiarize yourself with the Transaction Flow of ZoodPay.
Install the ZoodPay WooCommerce Extension
- ZoodPay WordPress Plugin Available on GitHub
- Log in to your website’s Wordpress admin.
- Ex: your-website.com/wp-admin
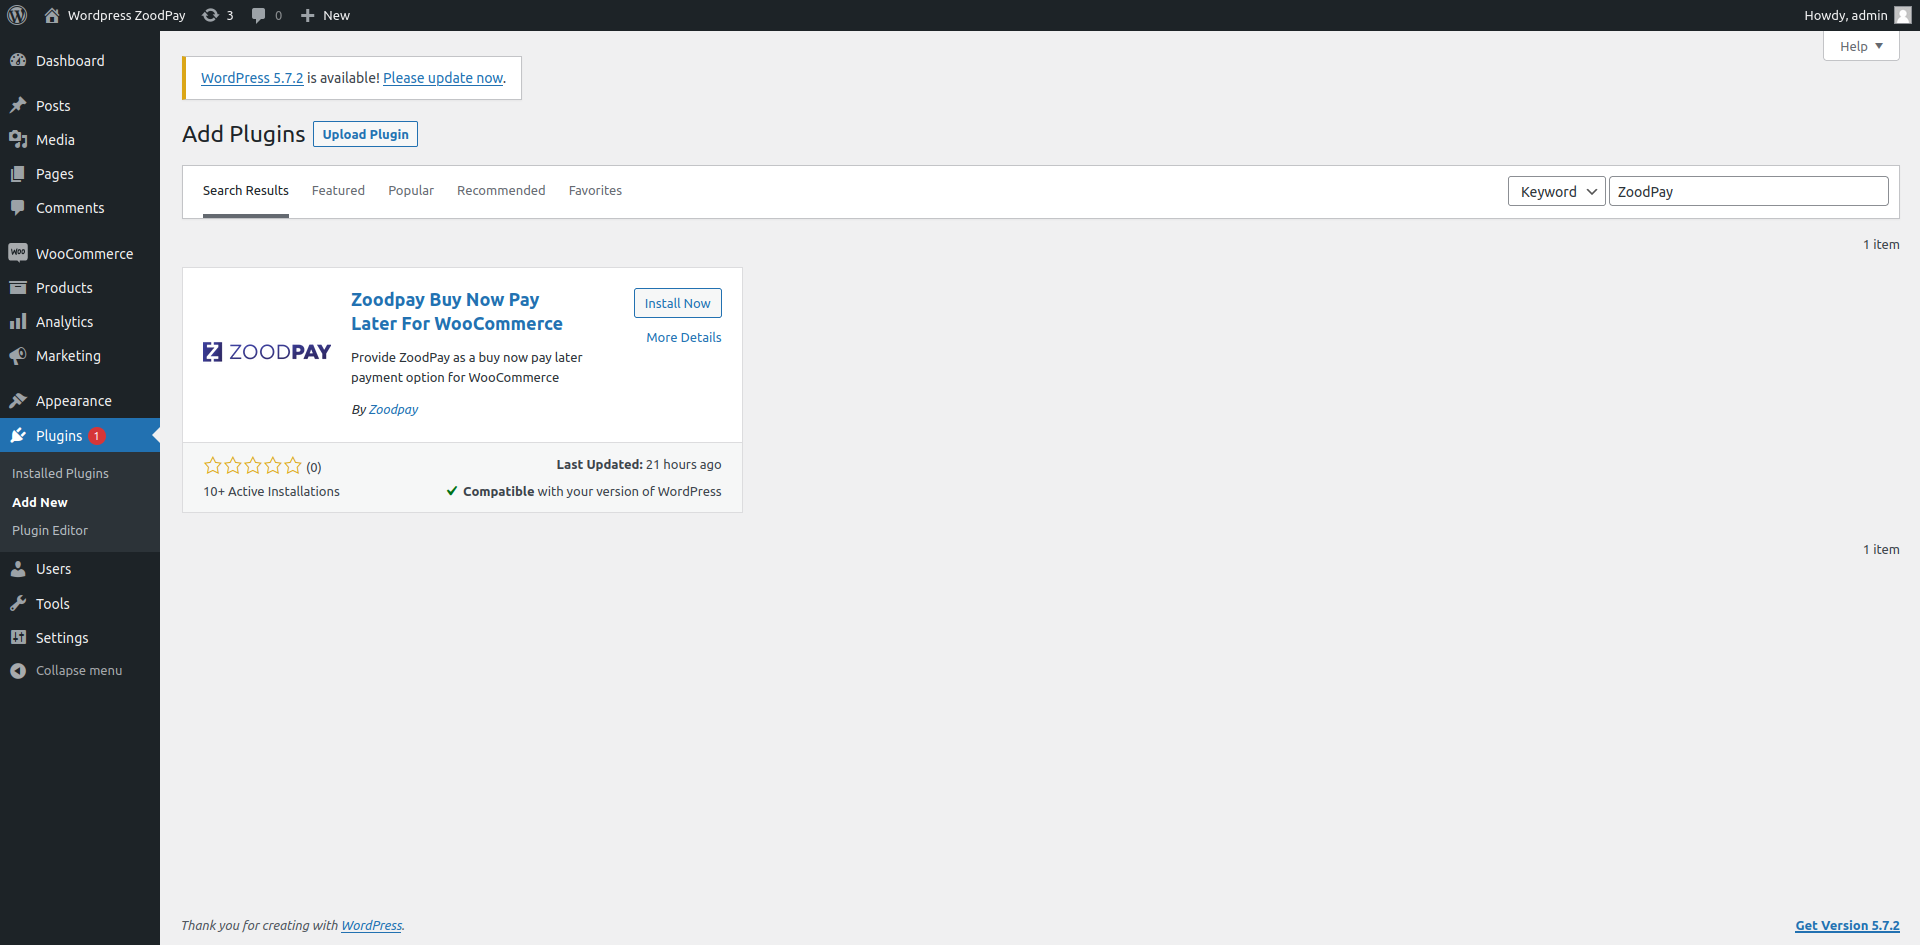
- In the left sidebar, click Plugins > Add New.
- Search for ZoodPay.
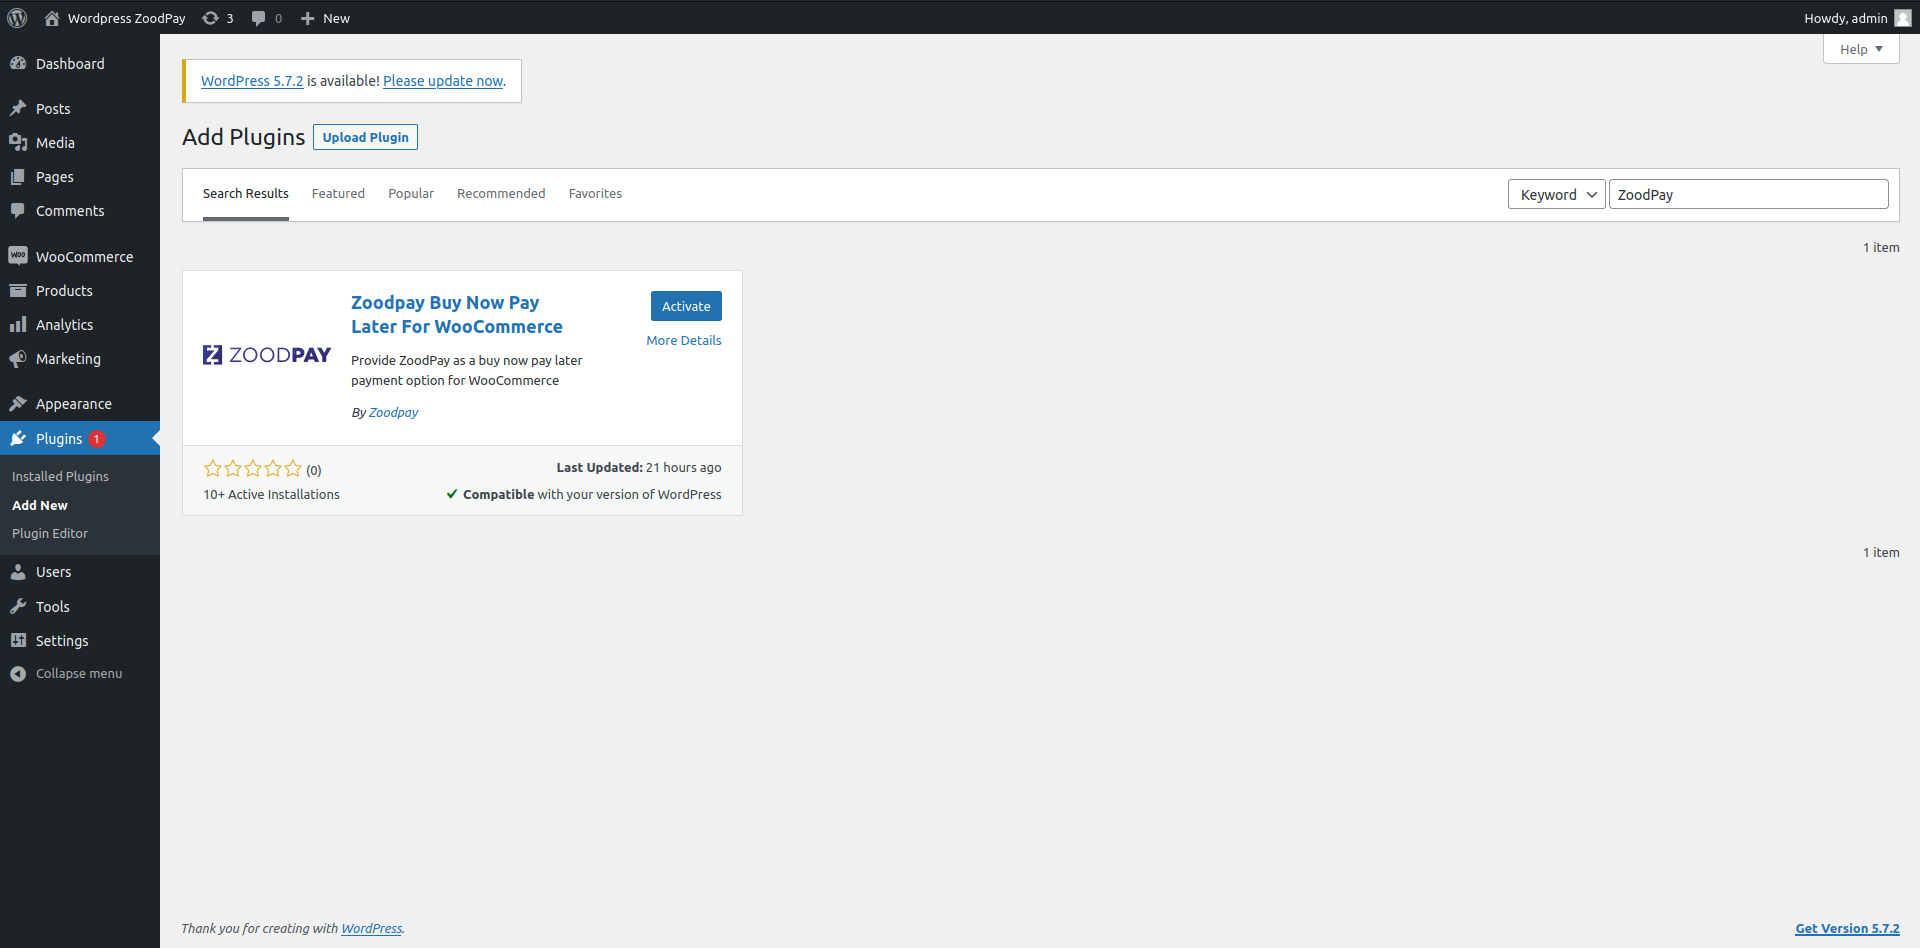
- Click Install Now.
- Click Activate
Admin Configuration
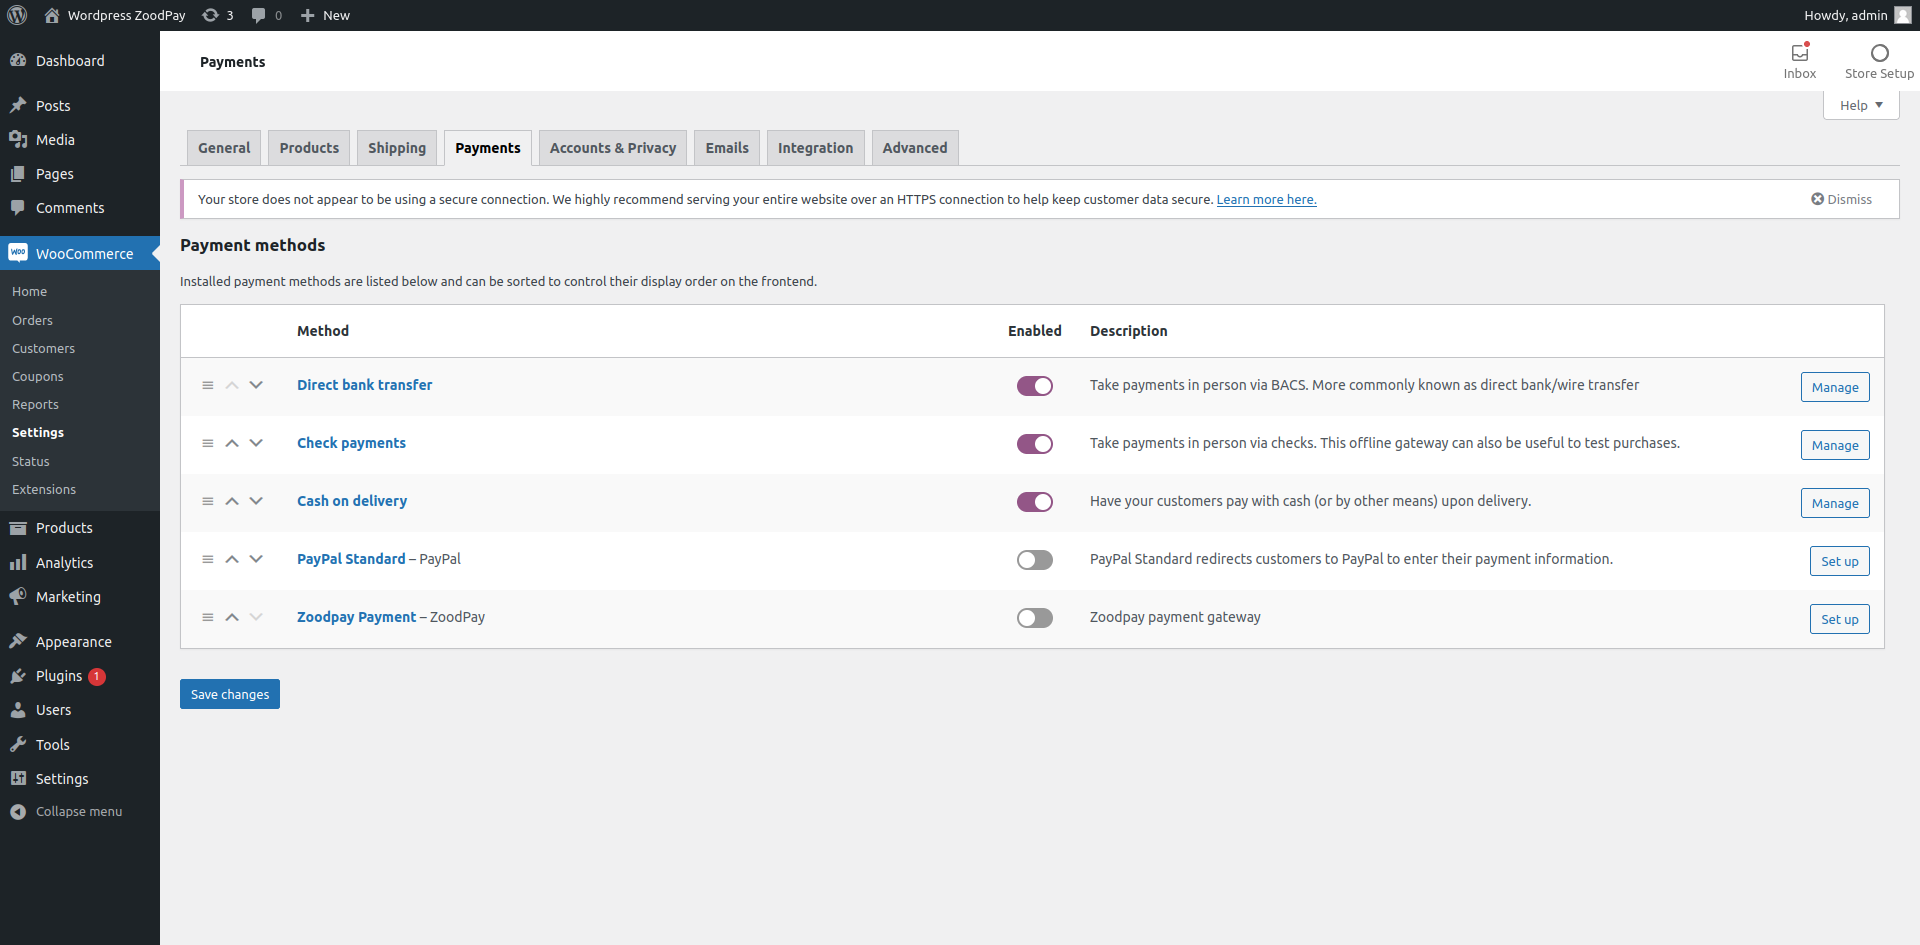
- In the left sidebar, click WooCommerce > Settings .
- Select the Payments tab.
- Click the Manage button for ZoodPay
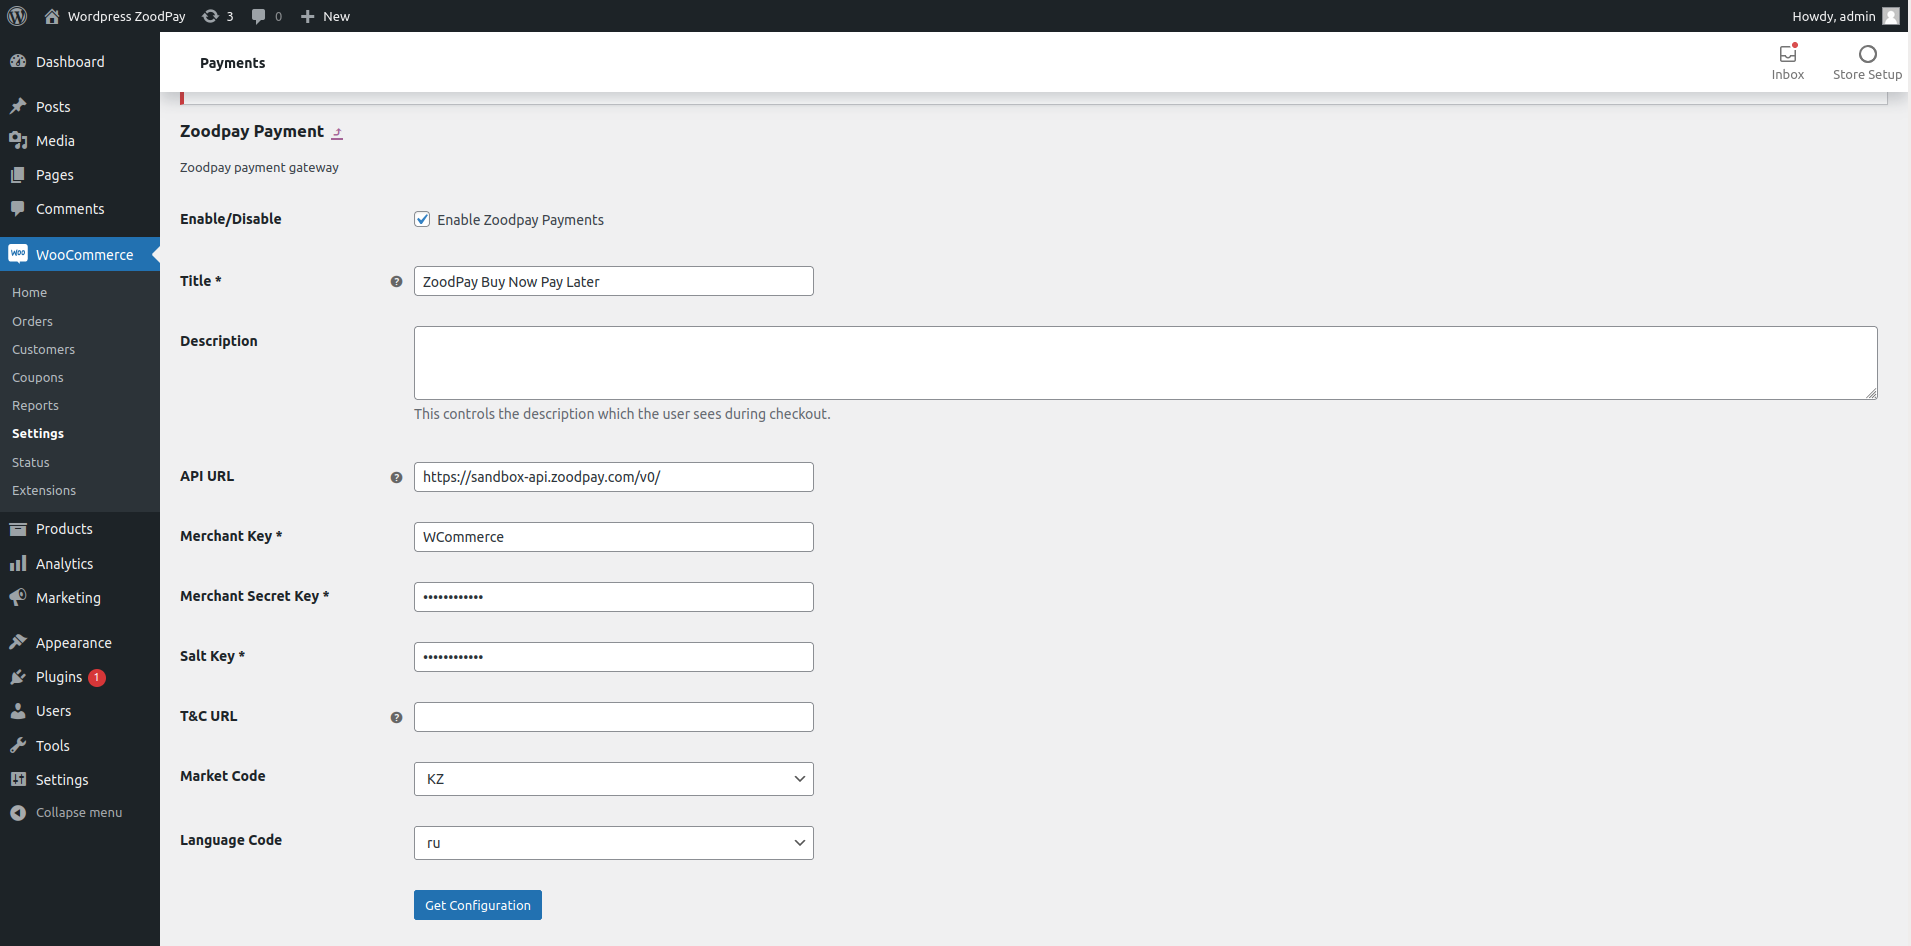
- Check the Enable/Disable checkbox for enabling ZoodPay.
- Set Title for ZoodPay Buy Now Pay Later .
- Set Merchant Key as received from the ZoodPay Business Team.
- Set Merchant Secret Key as received from the ZoodPay Business Team.
- Set Merchant Salt Key as received from the ZoodPay Business Team.
- Set API URL as received from the ZoodPay Business Team.
- Click on the API HealthCheck, to verify the API HEALTH
- Select Market Code Based on your Country.
- Select Language Code Based on your Preference.
- Click Save Changes.
- Click Fetch Configuration
WooCommerce Sandbox Testing
- In the ZoodPay configuration page of your WooCommerce admin, enter the Sandbox API URL, Merchant Key, Merchant Secret Key, and Merchant Salt and click save the configuration and afterwards fetch the configuration
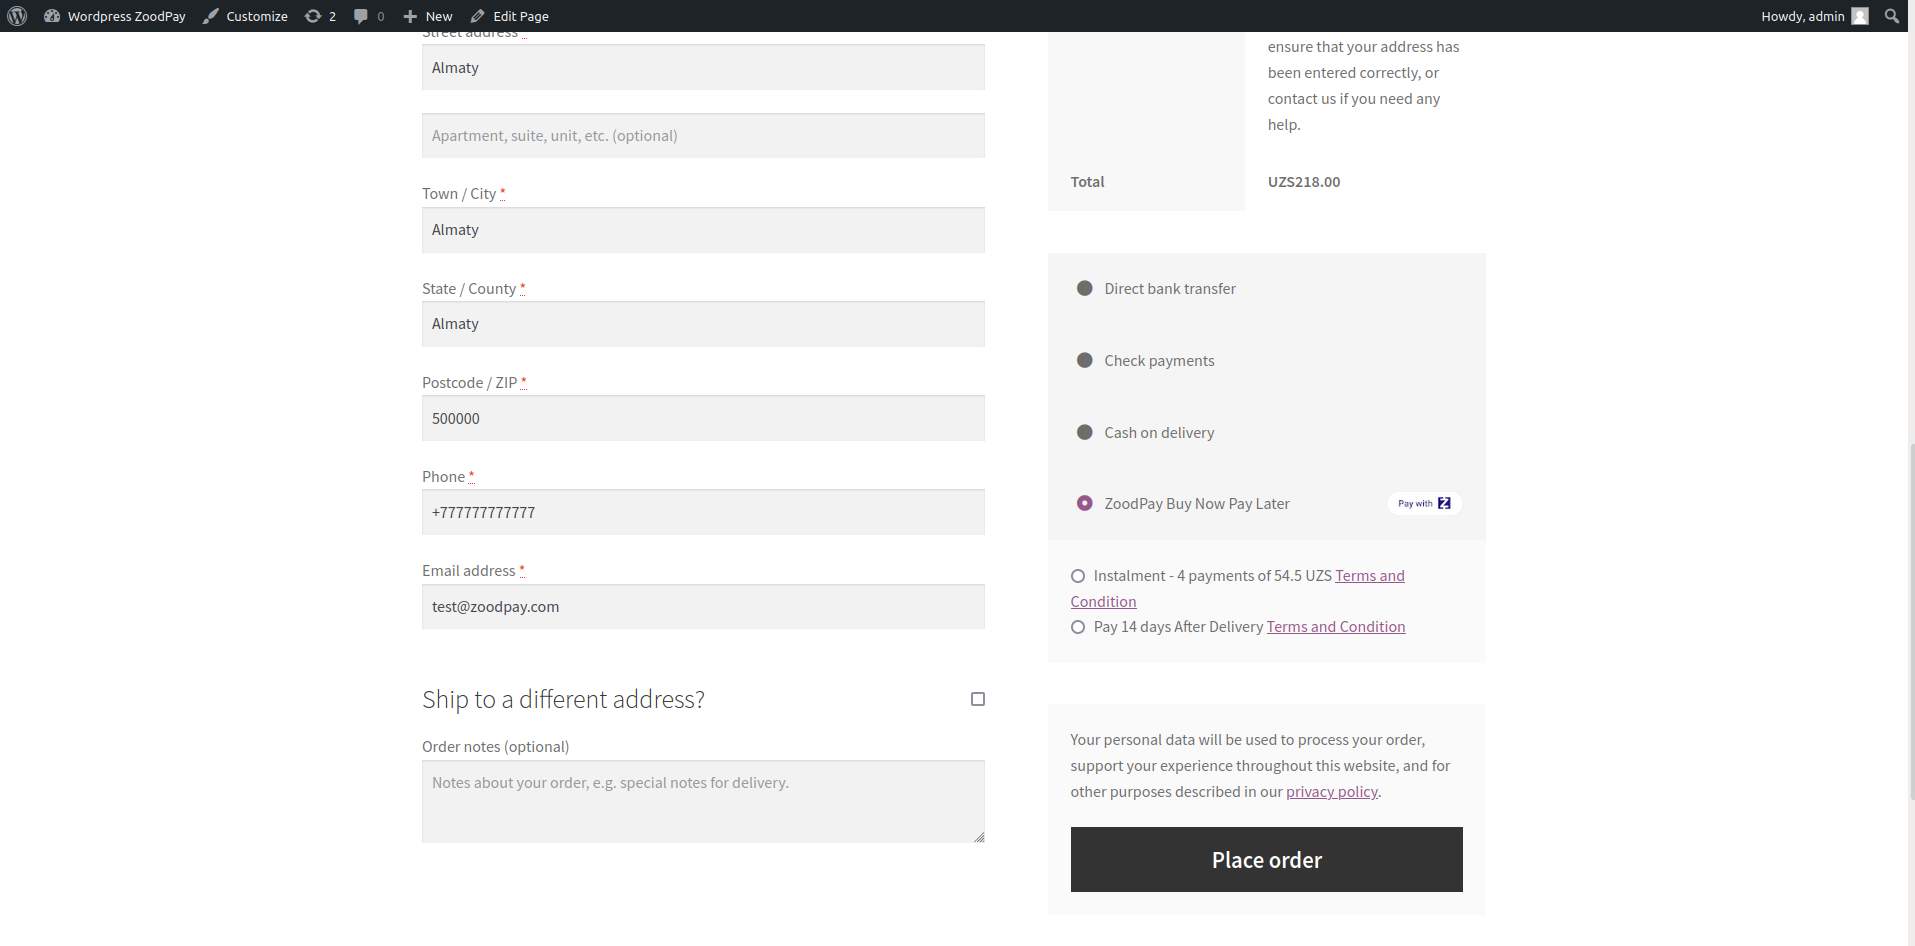
- On your website, add an item to the cart, then proceed to Checkout and select ZoodPay as the payment method and choose an available option.
- Click Place Order, and you should be redirected to the ZoodPay UI page.
- Follow instruction that provided on ZoodPay UI to Complete Order.
- After the payment is completed on ZoodPay UI, you should be redirected back to your website and see a successful payment page.
- Sandbox testing is complete. and you can verify the test order from the ZoodPay Merchant Dashboard
WooCommerce Live Checkout
- In the ZoodPay configuration page of your WooCommerce admin, enter the Live API URL, Merchant Key, Merchant Secret Key, and Merchant Salt and click save the configuration and afterwards fetch the configuration
- On your website, add an item to the cart, then proceed to Checkout and select ZoodPay as the payment method and choose an available option .
- Click Place Order, and you should be redirected to the ZoodPay UI page.
- If you are redirected to the ZoodPay Payment UI, your integration is complete. Congratulations!
- Warning Don’t complete the payment. Your checkout is now live, so you will be charged if you complete.
Troubleshooting
If testing was unsuccessful, review the following:
- Check that ZoodPay WooCommerce extension is the most updated version.
- ZoodPay extension is activated.
- Go to Plugins > Installed Plugins, then click View Details next to the ZoodPay WooCommerce Payment. If there is an option to upgrade, do so now.
- Go to WooCommerce > Settings and ensure the switch is turned On.
- Merchant Key was entered correctly.
- Merchant Secret Key was entered correctly.
- Merchant Salt Key was entered correctly.
- API URL was entered correctly.
- Check API HEALTH
- Fetch Configuration
- ZoodPay extension is activated.
Uninstall Steps
- Go to Plugins > Installed Plugins.
- Under ZoodPay WooCommerce Payment, click Deactivate then click Delete.
What to do if I need any help?
- Please write your issue/query to [email protected] .
OpenCart Extension
This guide describes how to integrate ZoodPay into your OpenCart website so that you can provide ZoodPay as a payment option for your customers. After integrating with ZoodPay, your OpenCart site will:
- Offer ZoodPay as a payment option on the checkout page.
- Refund ZoodPay payments from OpenCart order management system.
Integration Steps
Required Steps Before Integration
- You should have a ZoodPay Merchant account.
- Please visit our Contact Page if you don’t have an account.
- Make sure you have the following details from ZoodPay.
- Merchant Key
- Merchant Secret
- Merchant Salt
- ZoodPay API URL
- Familiarize yourself with the Transaction Flow of ZoodPay.
Install the ZoodPay OpenCart Extension
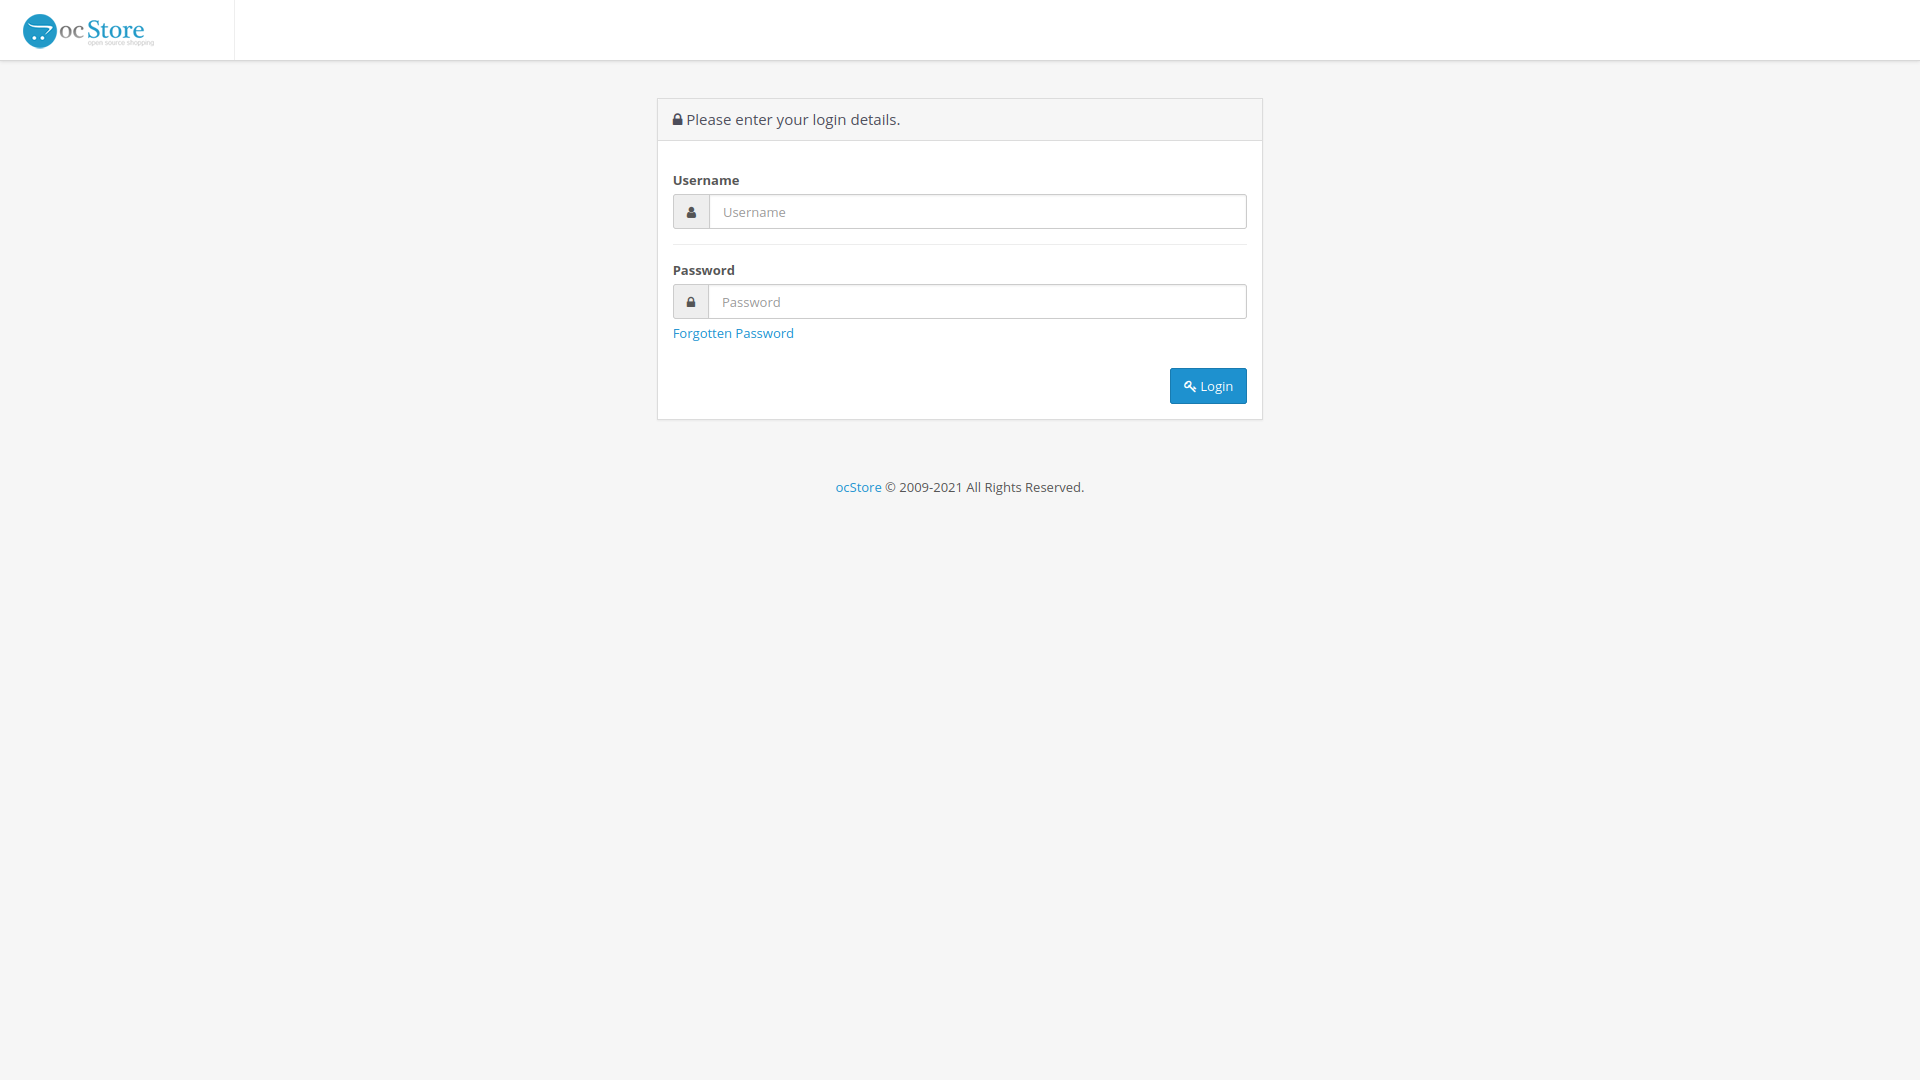
- Log in to your website’s Opencart admin.
- Ex: your-website.com/admin
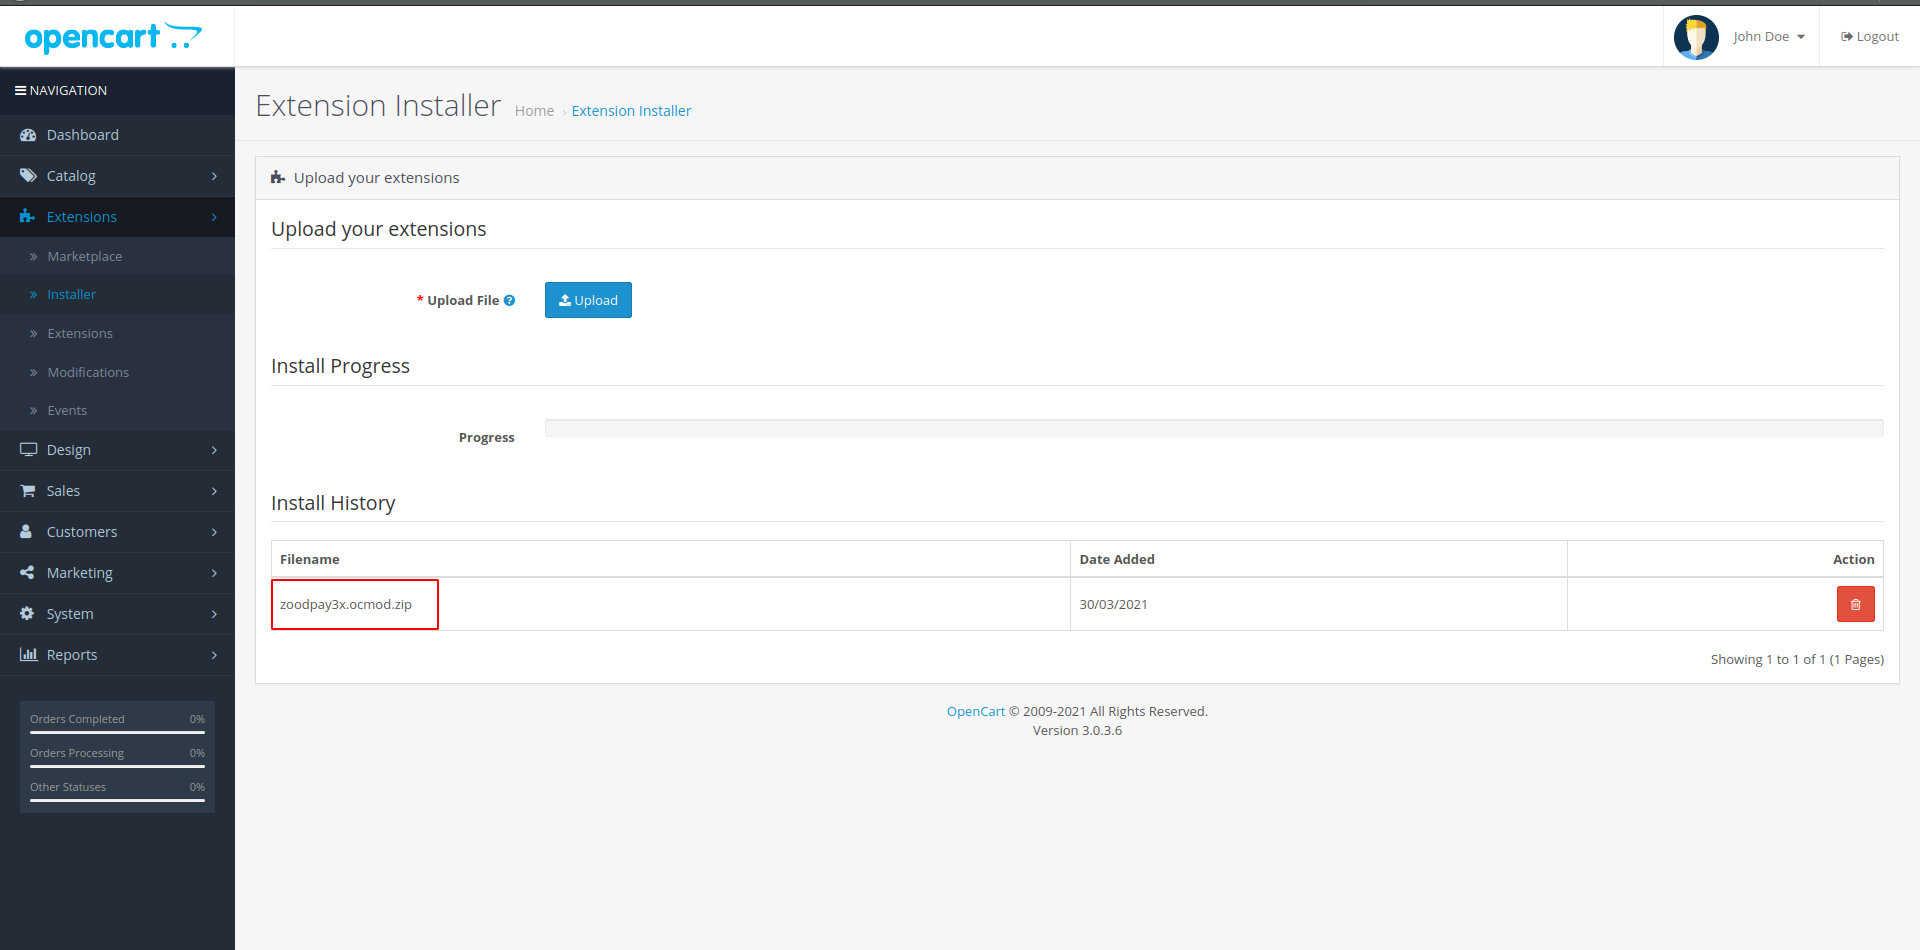
- In the left sidebar, click Extensions > Installer > Upload.
- Locate the Zip file that you downloaded from ZoodPay Opencart Extension .
- It will install the ZoodPay Extension.
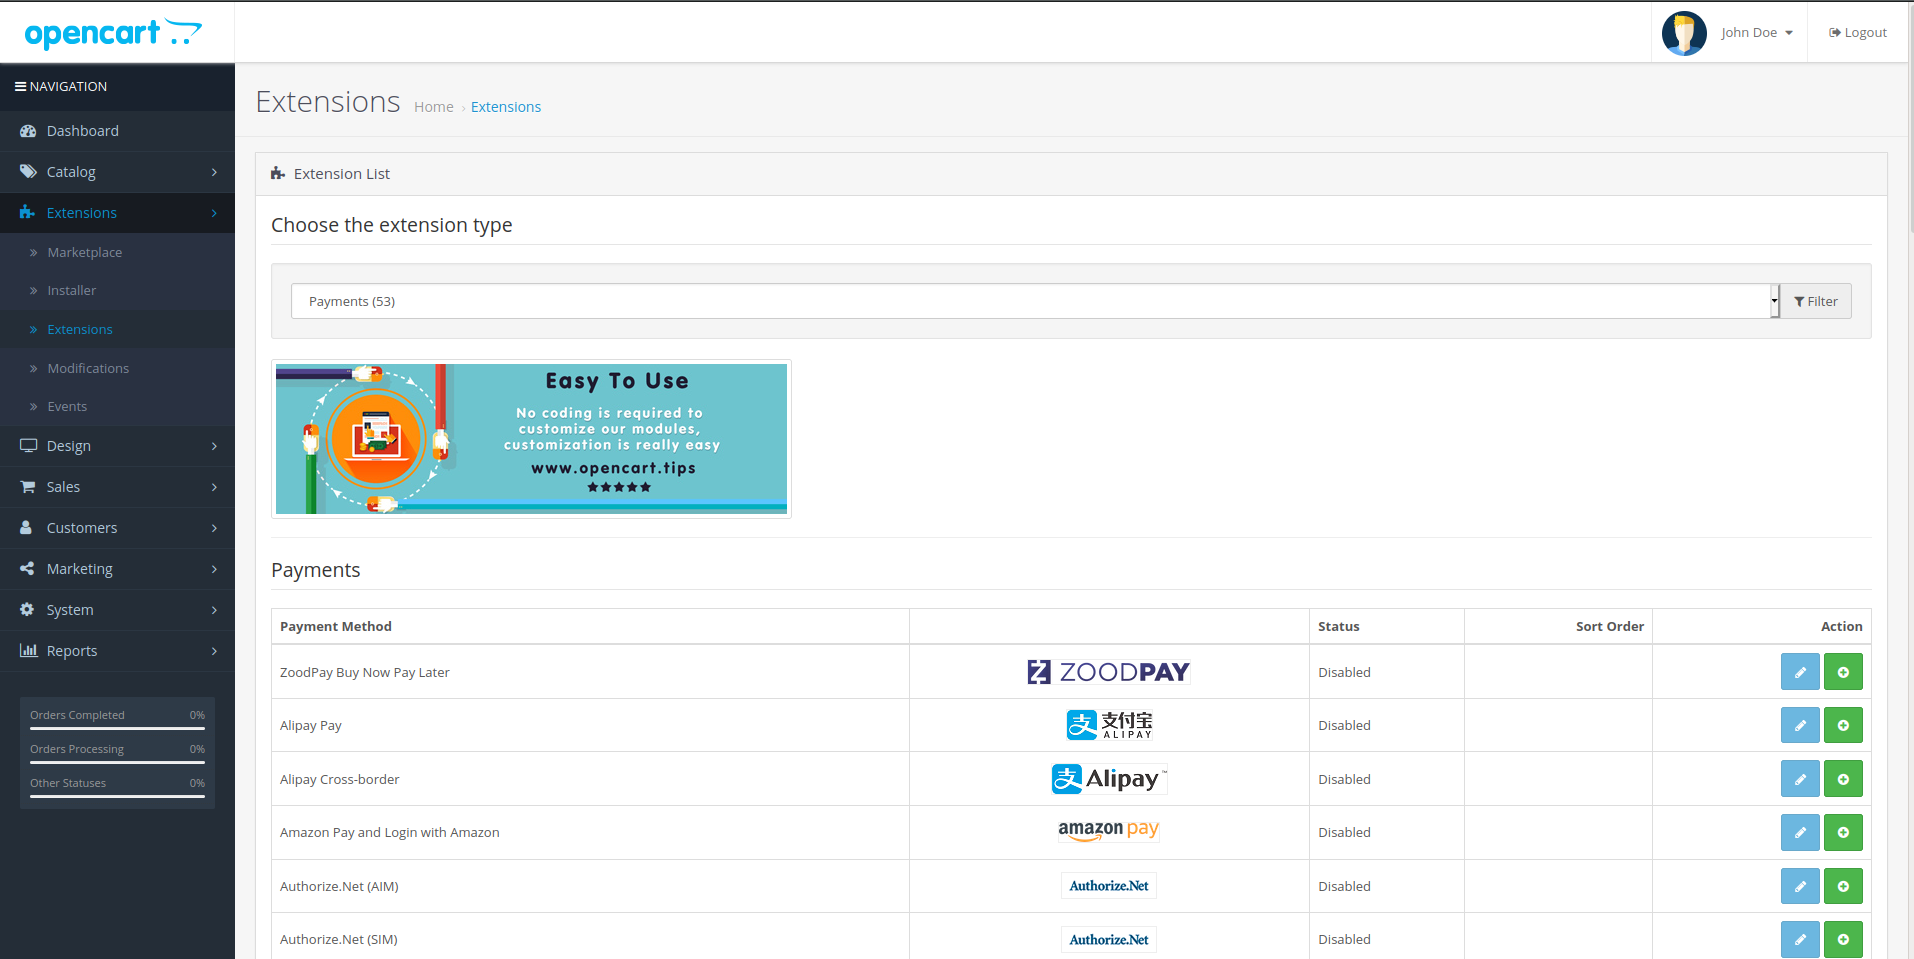
- Navigate to Extension > Payments > Find ZoodPay Buy Now Pay Later
Admin Configuration
Filling Information
- Select Install
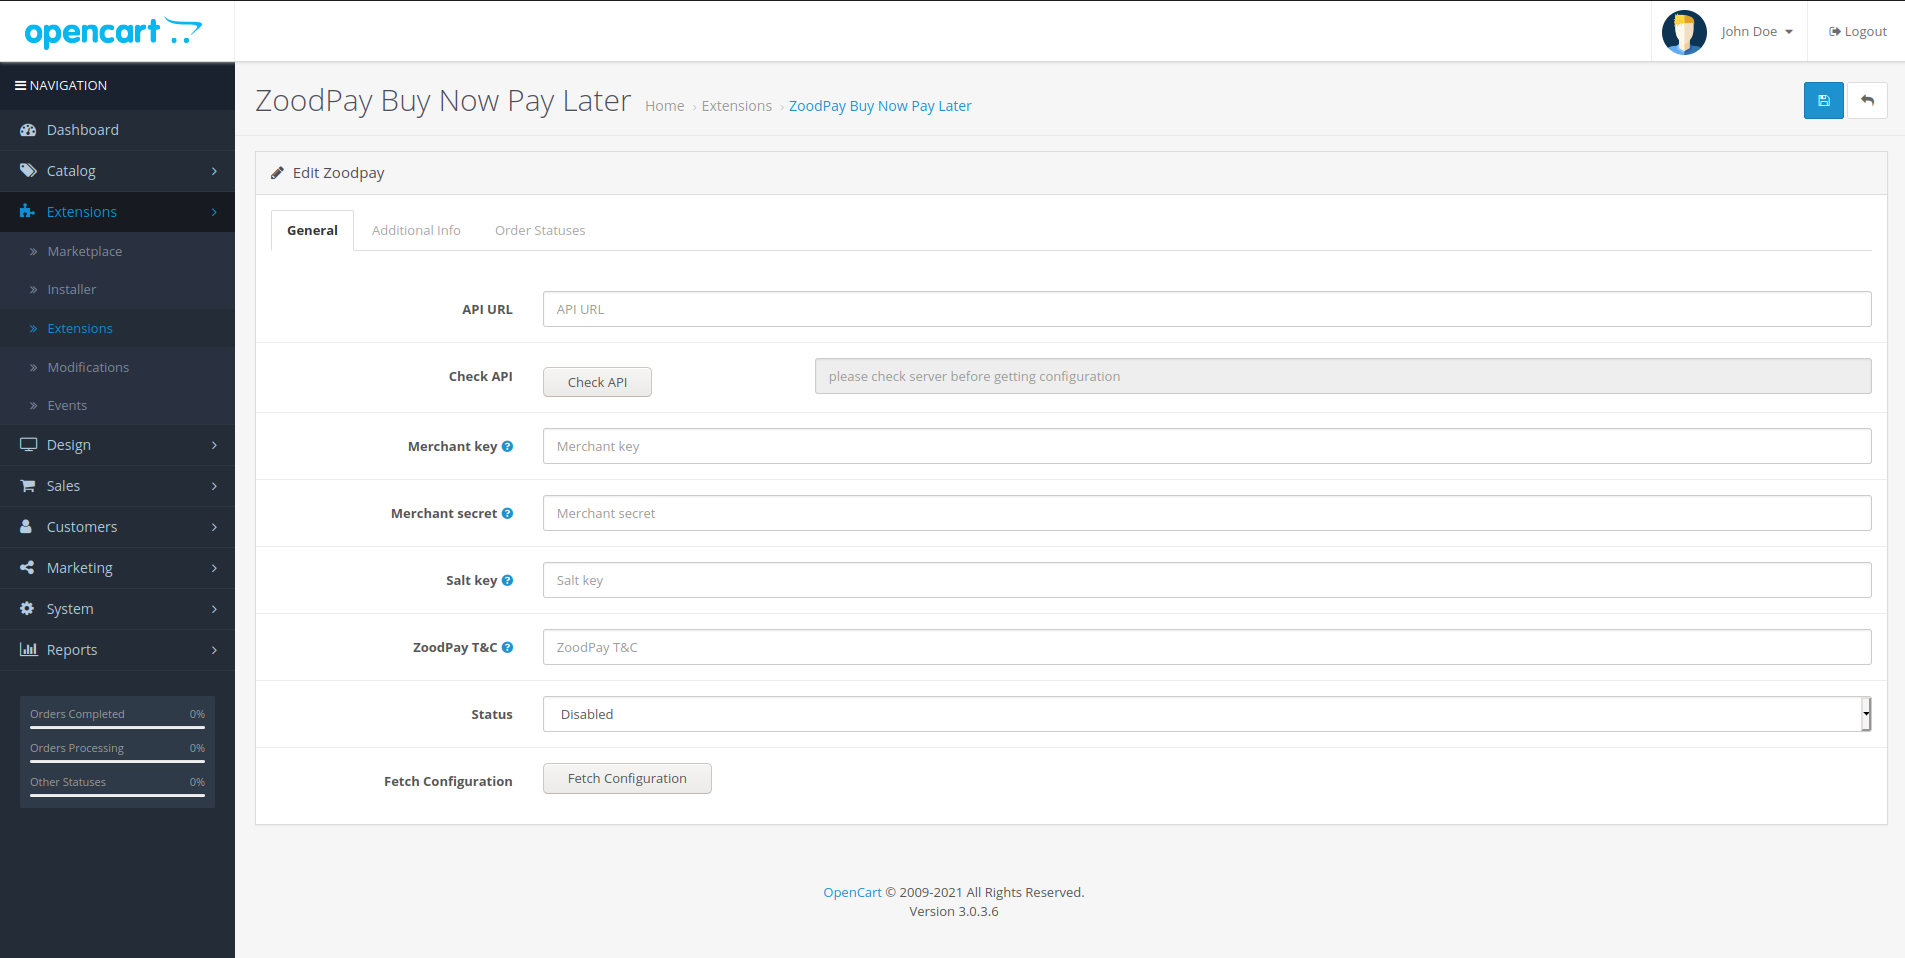
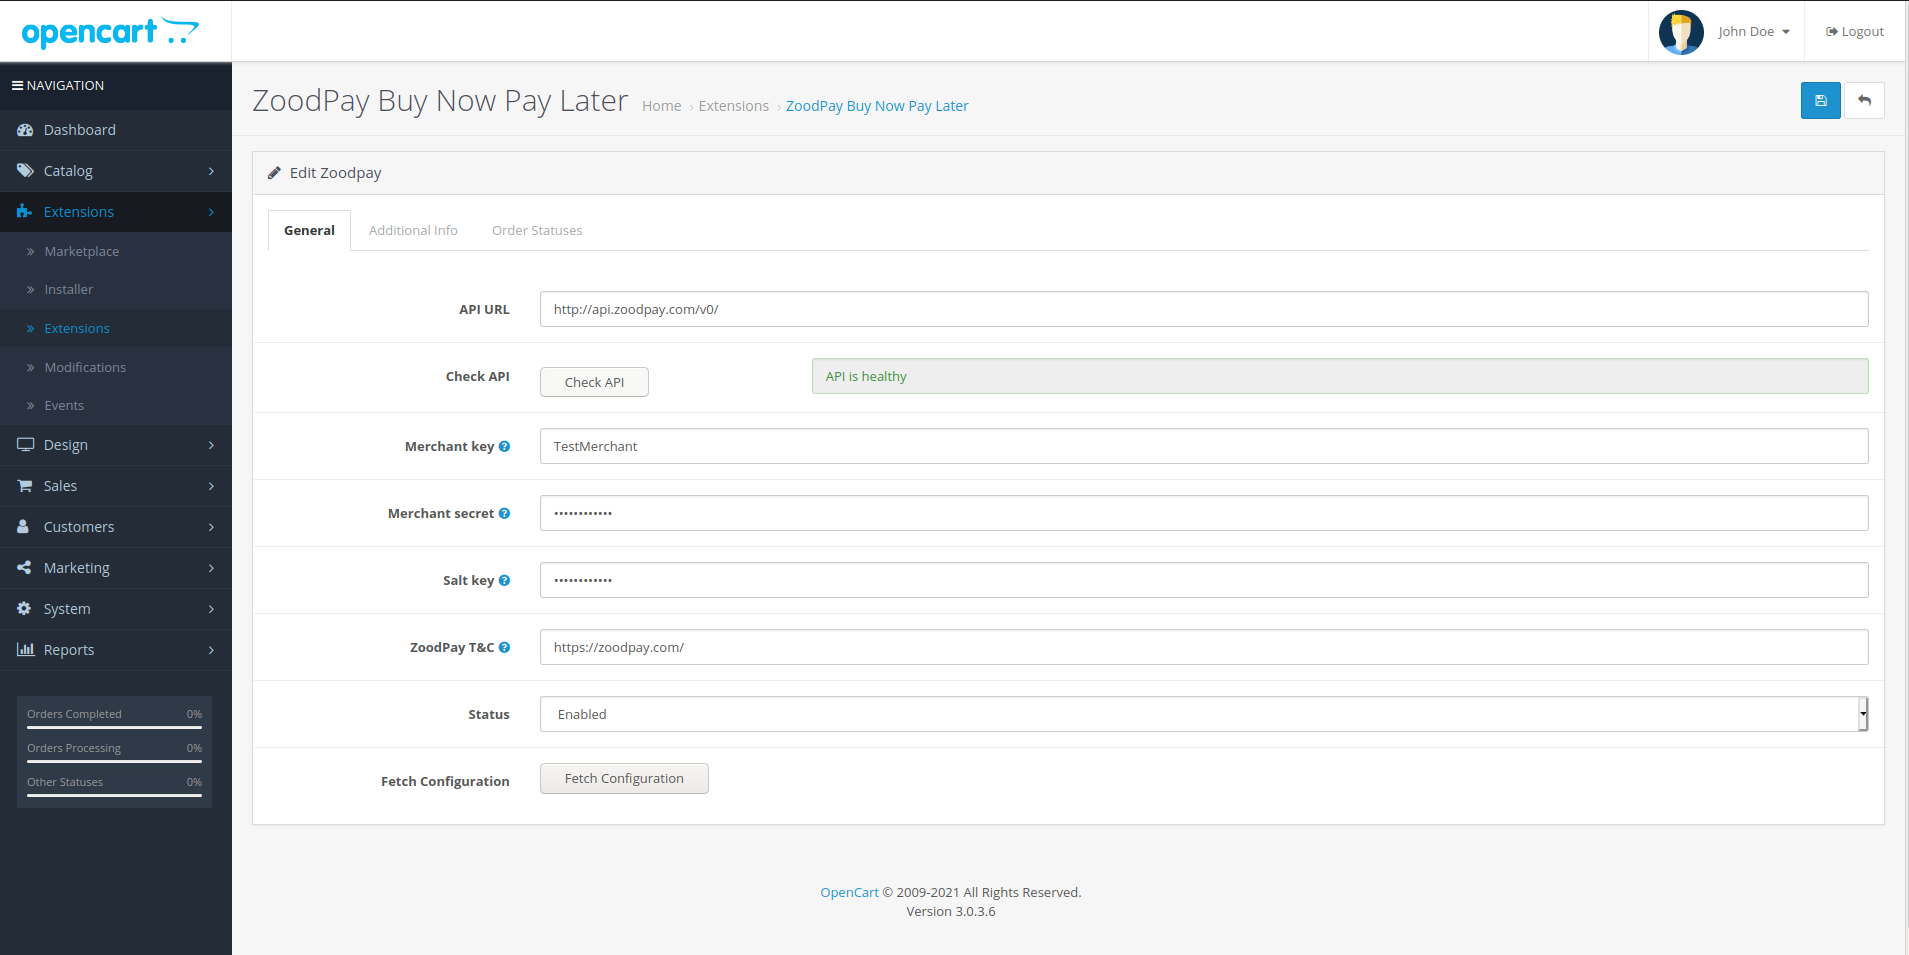
- Select Edit ZoodPay Buy Now Pay Later.
- Select the Enable for enabling ZoodPay.
- Set Merchant Key as received from the ZoodPay Business Team.
- Set Merchant Secret Key as received from the ZoodPay Business Team.
- Set Merchant Salt Key as received from the ZoodPay Business Team.
- Set API URL as received from the ZoodPay Business Team.
- Click on the API HealthCheck, to verify the API HEALTH
- Click Save Changes.
- Click Fetch Configuration
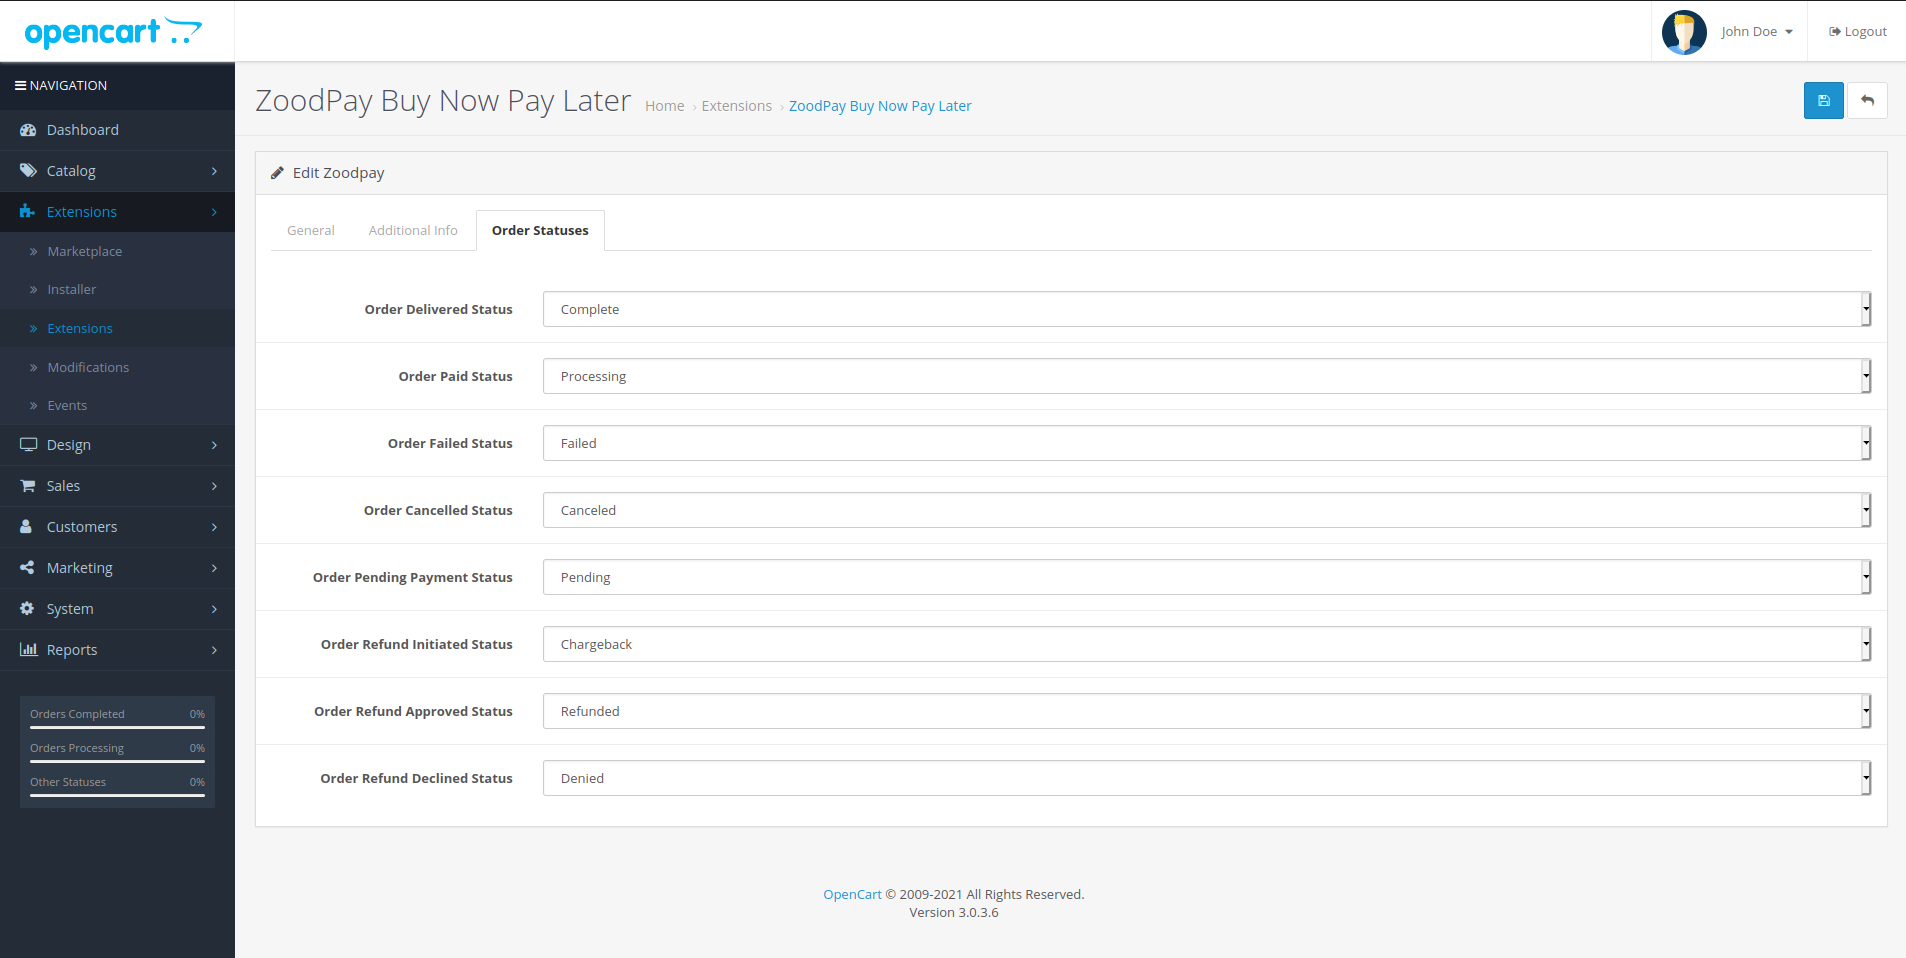
Selecting Order Status
- Select Order Statuses from the tab
- Fo Each Status, Select respective Status from your System
- Click Save Changes.
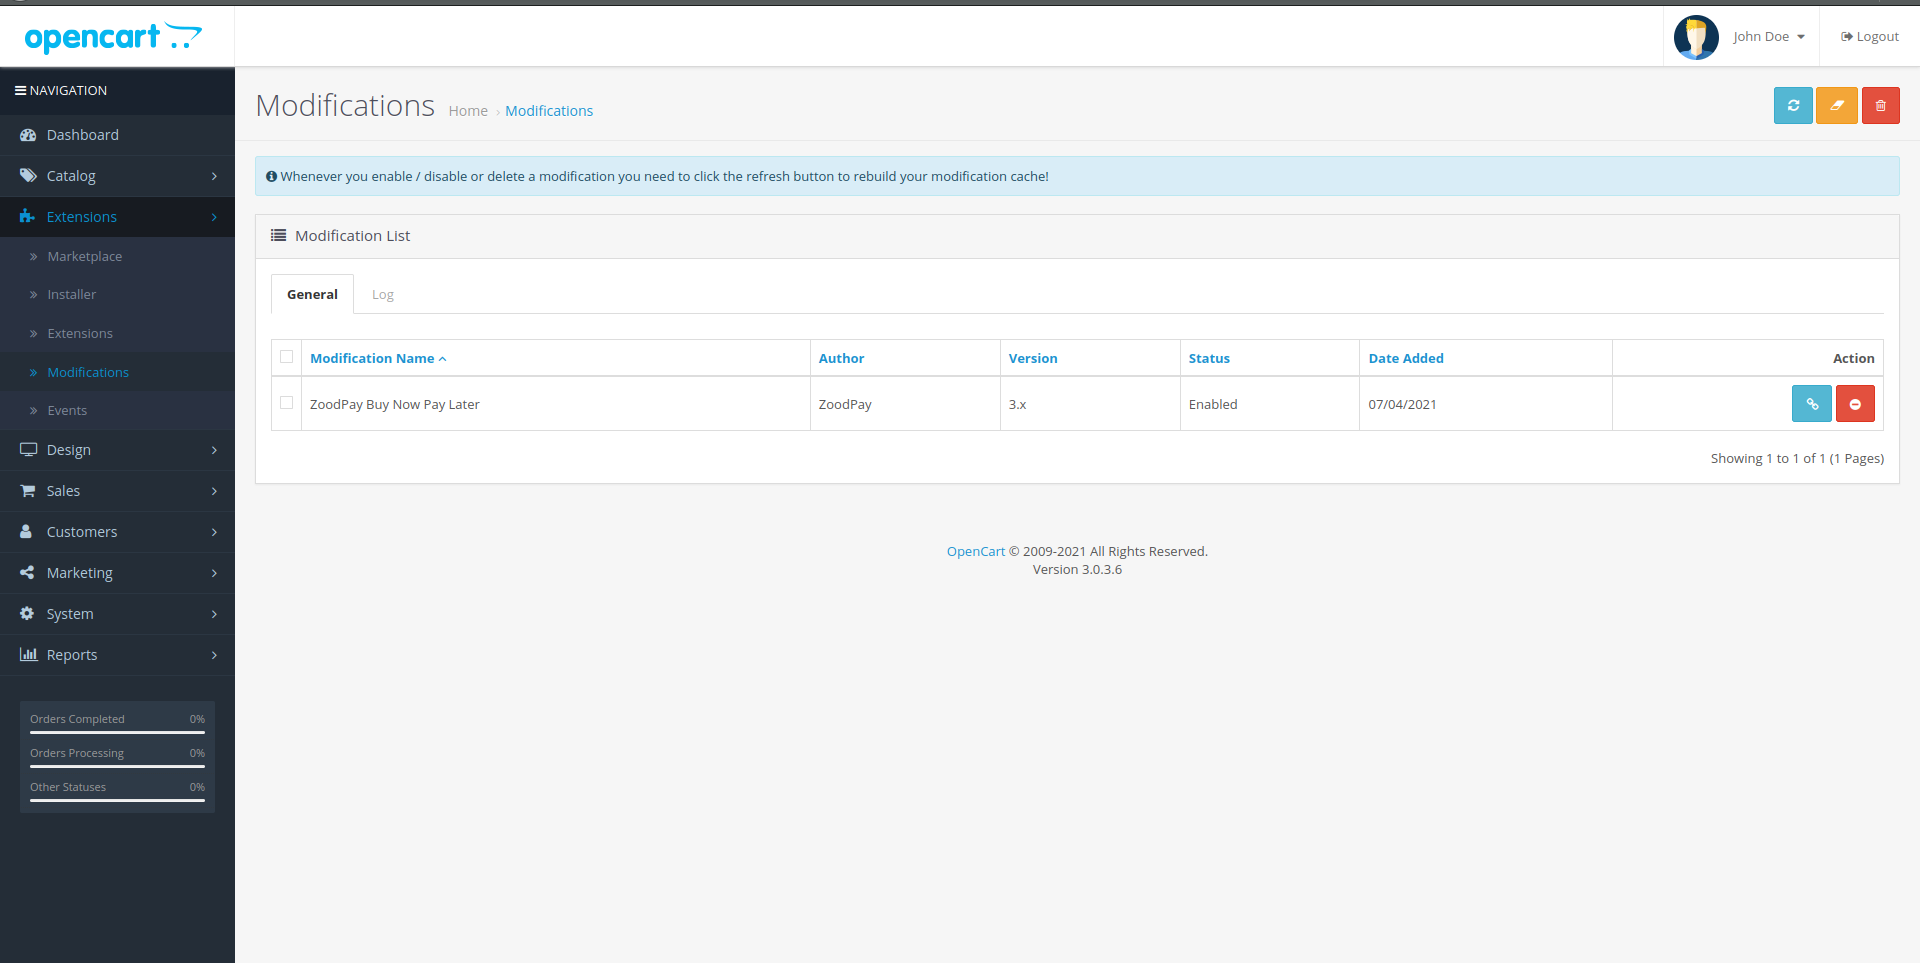
Refresh the Modifications
- Navigate to Extensions > Modifications
- Click Clear Modification
- Click Refresh Modification
- Click Save Changes.
Opencart Sandbox Testing
- In the ZoodPay configuration page of your OpenCart admin, enter the Sandbox API URL, Merchant Key, Merchant Secret Key, and Merchant Salt and click save the configuration, afterwards fetch the configuration and refresh modifications
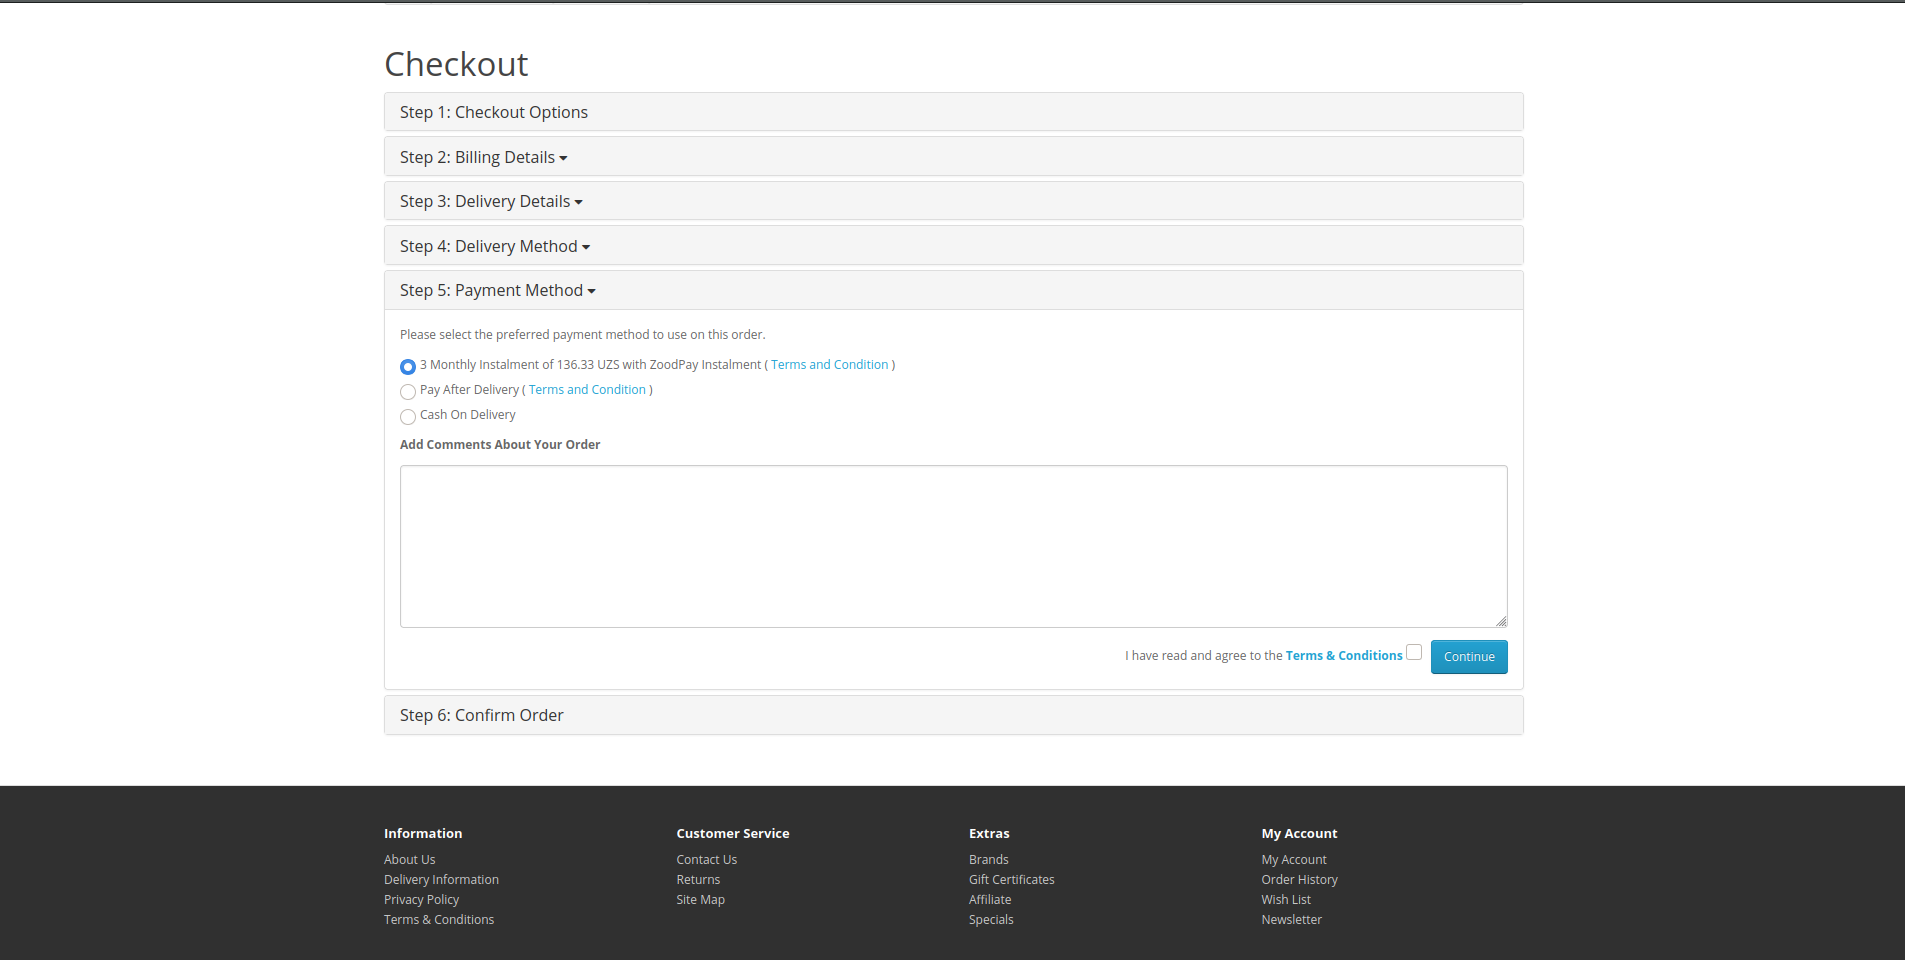
- On your website, add an item to the cart, then proceed to Checkout and select ZoodPay as the payment method and choose an available option.
- Click Place Order, and you should be redirected to the ZoodPay UI page.
- Follow instruction that provided on ZoodPay UI to Complete Order.
- After the payment is completed on ZoodPay UI, you should be redirected back to your website and see a successful payment page.
- Sandbox testing is complete. and you can verify the test order from the ZoodPay Merchant Dashboard
OpenCart Live Checkout
- In the ZoodPay configuration page of your OpenCart admin, enter the Live API URL, Merchant Key, Merchant Secret Key, and Merchant Salt and click save the configuration, afterwards fetch the configuration and refresh modifications
- On your website, add an item to the cart, then proceed to Checkout and select ZoodPay as the payment method and choose an available option .
- Click Place Order, and you should be redirected to the ZoodPay UI page.
- If you are redirected to the ZoodPay Payment UI, your integration is complete. Congratulations!
- Warning Don’t complete the payment. Your checkout is now live, so you will be charged if you complete.
Troubleshooting
If testing was unsuccessful, review the following:
- Check that ZoodPay OpenCart extension is the most updated version.
- ZoodPay extension is activated.
- Go to OpenCart Market Place > Download the latest version of ZoodPay Opencart Extension
- Go to OpenCart Admin Page > Extensions and ensure the ZoodPay is Enabled.
- Merchant Key was entered correctly.
- Merchant Secret Key was entered correctly.
- Merchant Salt Key was entered correctly.
- API URL was entered correctly.
- Check API HEALTH
- Fetch Configuration
- ZoodPay extension is activated.
Uninstall Steps
- Go to Extensions > Payment.
- Uninstall the ZoodPay Buy Now Pay Later
What to do if I need any help?
- Please write your issue/query to [email protected] .
Magento 2 Extension
This guide describes how to integrate ZoodPay into your Magento website so that you can provide ZoodPay as a payment option for your customers. After integrating with ZoodPay, your Magento site will:
- Offer ZoodPay as a payment option on the checkout page.
- Refund ZoodPay payments from Magento order management system.
Integration Steps
Required Steps Before Integration
- You should have a ZoodPay Merchant account.
- Please visit our Contact Page if you don’t have an account.
- Make sure you have the following details from ZoodPay.
- Merchant Key
- Merchant Secret
- Merchant Salt
- ZoodPay API URL
- Familiarize yourself with the Transaction Flow of ZoodPay.
Install the ZoodPay Magento 2 Extension
Manual Installation
- Download the copy of ZoodPay Magento 2 Extension Package from GitHub
- Unzip the file
- Navigate to Magento [Magento]/app/code/ using SFTP or SSH
- Copy the directory from unzipped folder to [Magento]/app/code/.
- We will enable the module with help of Magento CLI (command-line interface)
- bin/magento module:enable OrientSwiss_ZoodPay
- Setup Upgrade with help of Magento CLI (command-line interface)
- bin/magento setup:upgrade
- Dependencies Injection Compile with help of Magento CLI (command-line interface)
- bin/magento setup:di:compile
- Static Content deployment with help of Magento CLI (command-line interface)
- bin/magento setup:static-content:deploy
- Log in to Magento Admin and navigate to System > Cache Management
- Flush the cache storage by selecting Flush Cache Storage
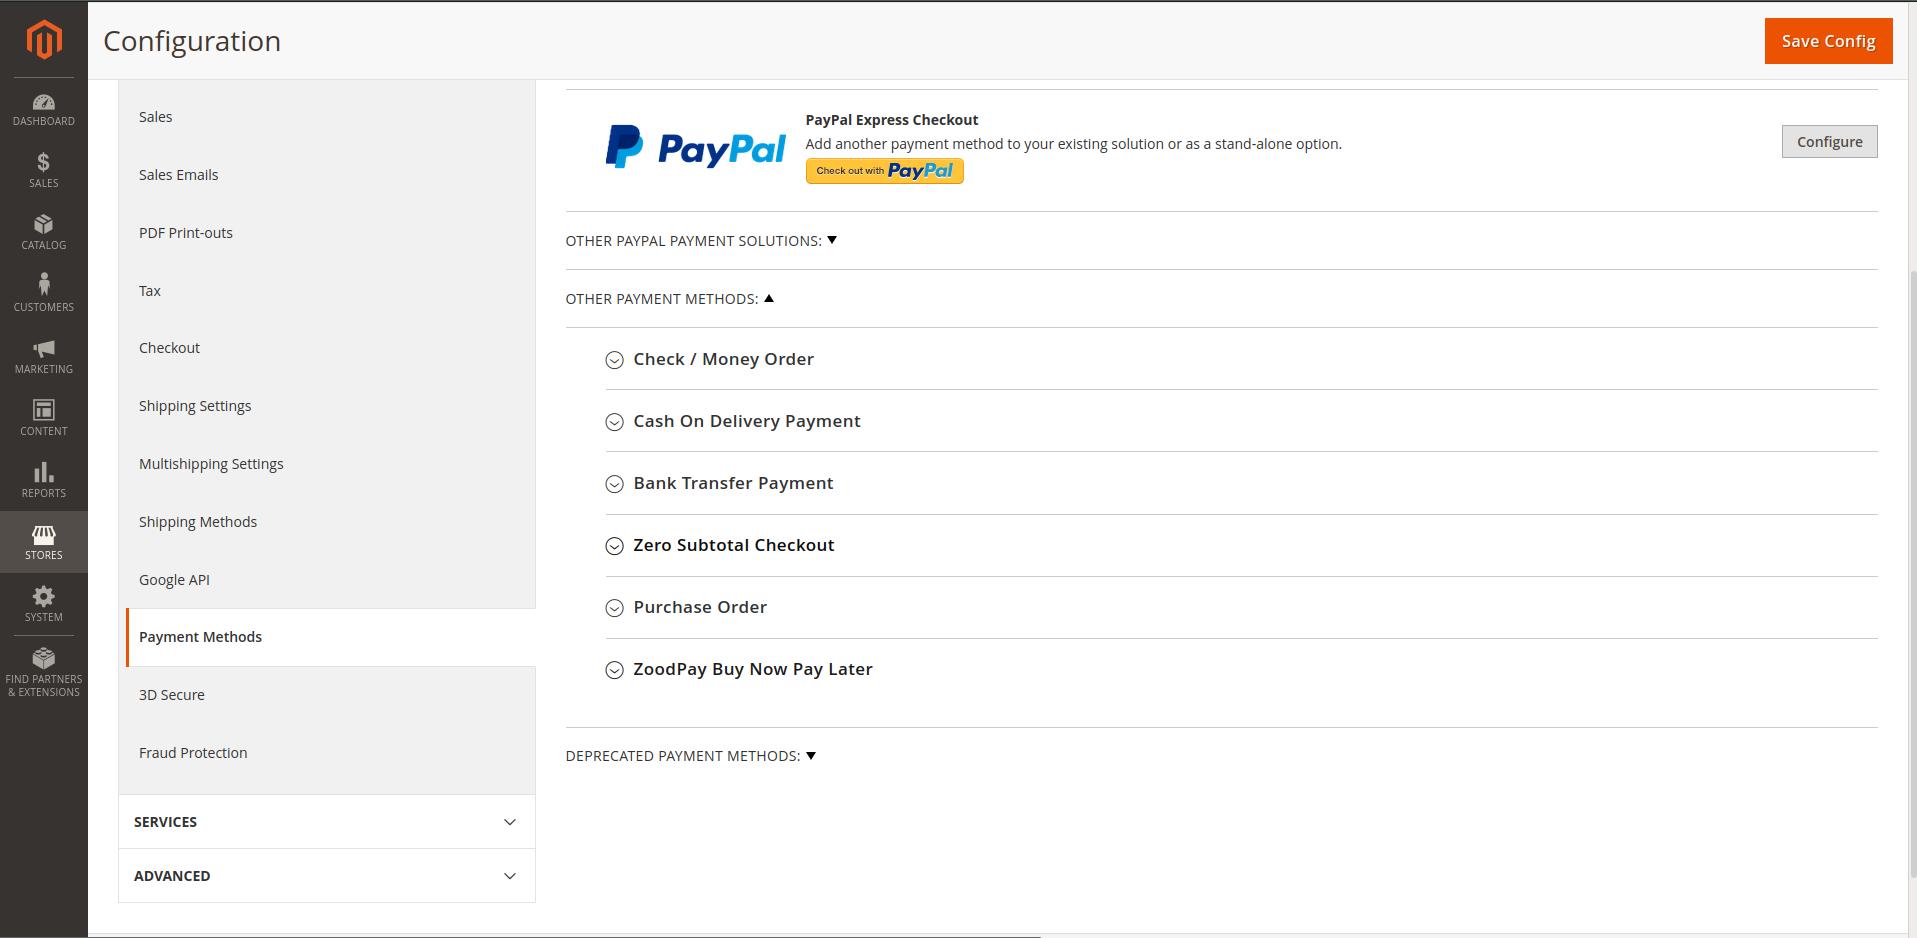
- In the Magento admin site, navigate to Stores > Configuration > Sales > Payment Methods and verify that ZoodPay Buy Now Pay Later is Displayed
Expected response: Module is enabled
Expected response: Generated code and dependency injection configuration successfully.
Expected response: Successful: XXXXXXX files; errors: 0.
Admin Configuration
Filling Information
- Expand ZoodPay Buy Now Pay Later
- Select the Enable for enabling ZoodPay.
- Set Merchant Key as received from the ZoodPay Business Team.
- Set Merchant Secret Key as received from the ZoodPay Business Team.
- Set Merchant Salt Key as received from the ZoodPay Business Team.
- Set API URL as received from the ZoodPay Business Team.
- Click on the API HealthCheck, to verify the API HEALTH
- Click Save Changes.
Refresh the Cache
- Login to Magento Admin and navigate to System > Cache Management
- Click Refresh Cache
Magento Sandbox Testing
- In the ZoodPay configuration page of your Magento admin, enter the Sandbox API URL, Merchant Key, Merchant Secret Key, and Merchant Salt and click save the configuration, afterwards fetch the configuration and refresh cache
- On your website, add an item to the cart, then proceed to Checkout and select ZoodPay as the payment method and choose an available option.
- Click Place Order, and you should be redirected to the ZoodPay UI page.
- Follow instruction that provided on ZoodPay UI to Complete Order.
- After the payment is completed on ZoodPay UI, you should be redirected back to your website and see a successful payment page.
- Sandbox testing is complete. and you can verify the test order from the ZoodPay Merchant Dashboard

Magento Live Checkout
- In the ZoodPay configuration page of your Magento admin, enter the Live API URL, Merchant Key, Merchant Secret Key, and Merchant Salt and click save the configuration, afterwards fetch the configuration and refresh cache
- On your website, add an item to the cart, then proceed to Checkout and select ZoodPay as the payment method and choose an available option .
- Click Place Order, and you should be redirected to the ZoodPay UI page.
- If you are redirected to the ZoodPay Payment UI, your integration is complete. Congratulations!
- Warning Don’t complete the payment. Your checkout is now live, so you will be charged if you complete.
Troubleshooting
If testing was unsuccessful, review the following:
- Check that ZoodPay Magento 2 extension is the most updated version.
- ZoodPay extension is activated.
- In the Magento admin site, navigate to Stores > Configuration > Sales > Payment Methods and ensure the ZoodPay Buy Now Pay Later is Enabled.
- Merchant Key was entered correctly.
- Merchant Secret Key was entered correctly.
- Merchant Salt Key was entered correctly.
- API URL was entered correctly.
- Check API HEALTH
- Fetch Configuration
Uninstall Steps
- in the Magento admin site, navigate to Stores > Configuration > Sales > Payment Methods and ensure the ZoodPay Buy Now Pay Later is Disabled.
- We will enable the module with help of Magento CLI (command-line interface)
- bin/magento module:disable OrientSwiss_ZoodPay
- Setup Upgrade with help of Magento CLI (command-line interface)
- bin/magento setup:upgrade
- Dependencies Injection Compile with help of Magento CLI (command-line interface)
- bin/magento setup:di:compile
- Static Content deployment with help of Magento CLI (command-line interface)
- bin/magento setup:static-content:deploy
- Log in to Magento Admin and navigate to System > Cache Management
- Flush the cache storage by selecting Flush Cache Storage
Expected response: Module is disabled
Expected response: Generated code and dependency injection configuration successfully.
Expected response: Successful: XXXXXXX files; errors: 0.
What to do if I need any help?
- Please write your issue/query to [email protected] .
1C-Bitrix Extension
This guide describes how to integrate ZoodPay into your 1C-Bitrix website so that you can provide ZoodPay as a payment option for your customers. After integrating with ZoodPay, your 1C-Bitrix site will:
- Offer ZoodPay as a payment option on the checkout page.
- Refund ZoodPay payments from 1C-Bitrix order management system.
Integration Steps
Required Steps Before Integration
- You should have a ZoodPay Merchant account.
- Please visit our Contact Page if you don’t have an account.
- Make sure you have the following details from ZoodPay.
- Merchant Key
- Merchant Secret
- Merchant Salt
- ZoodPay API URL
- Familiarize yourself with the Transaction Flow of ZoodPay.
Install the ZoodPay 1C-Bitrix Extension
Manual Installation
- Download the copy of ZoodPay 1C-Bitrix Extension Package from GitHub
- Unzip the file
- Navigate to 1C-Bitrix [Bitrix]/bitrix/modules/ using SFTP or SSH
- Copy the directory from unzipped folder to [Bitrix]/bitrix/modules/.
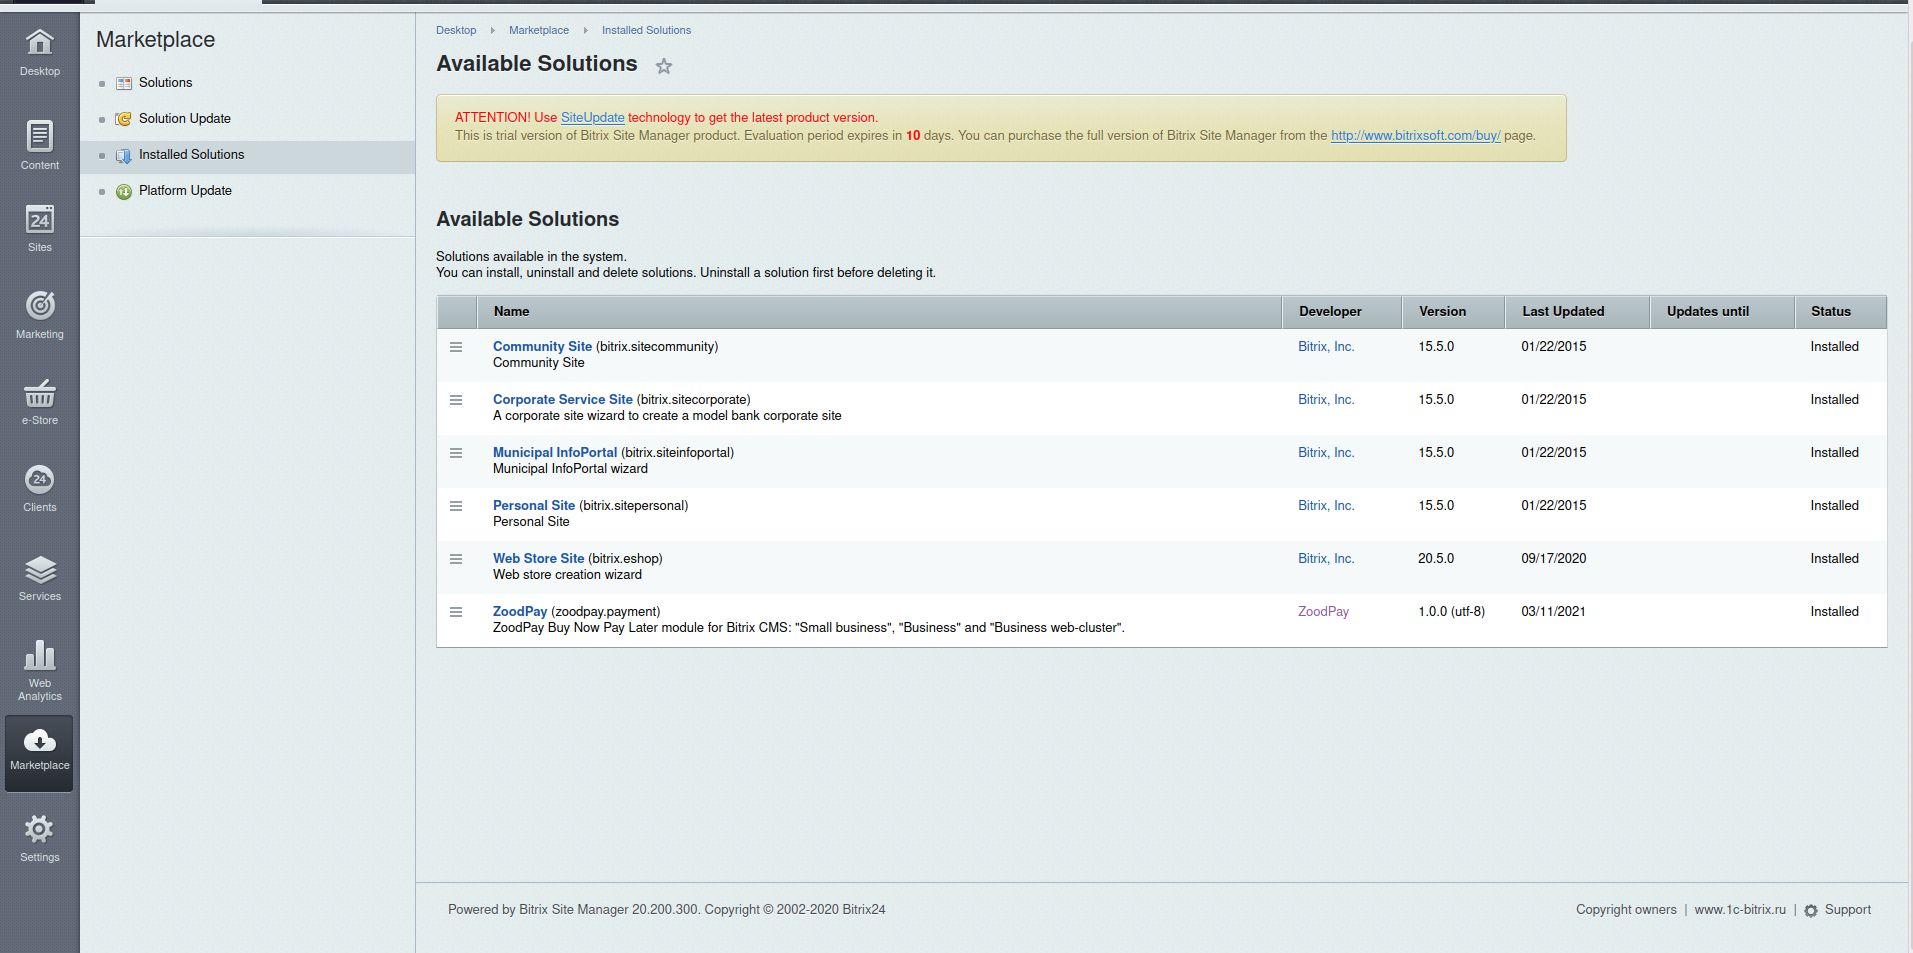
- Log in to 1C-Bitrix Admin and navigate to MarketPlace > Installed Solutions
- Click on Install ZoodPay Buy Now Pay Later
Admin Configuration
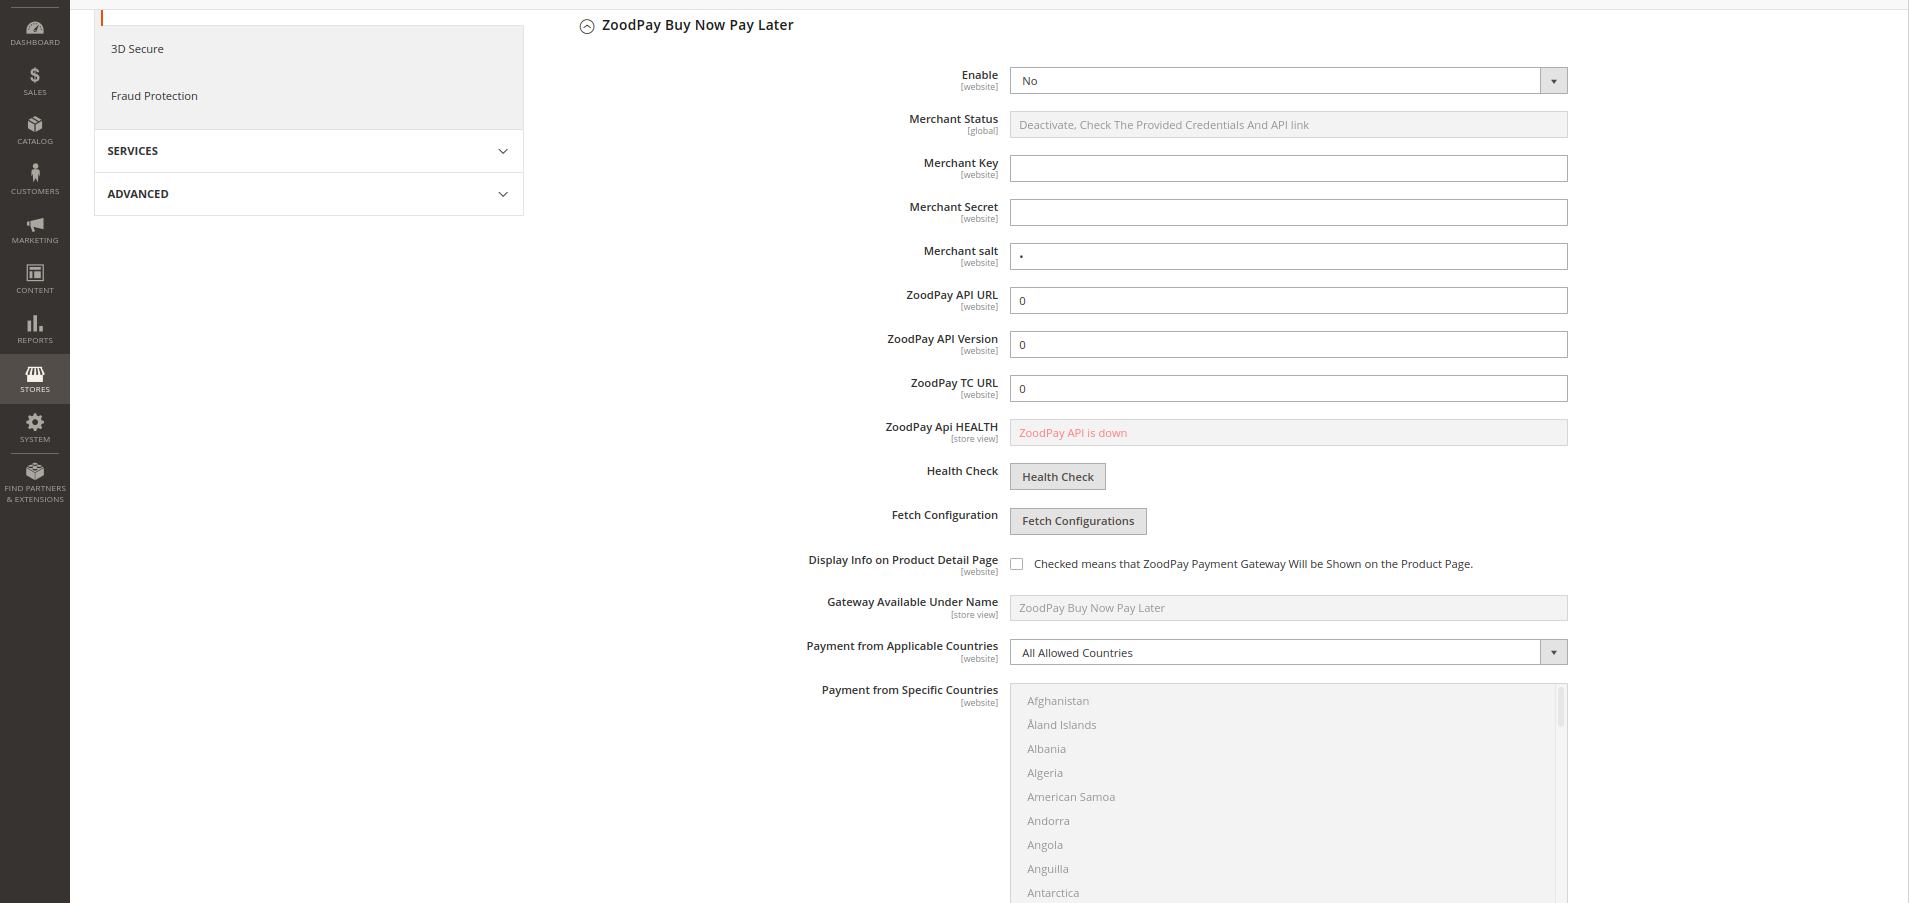
Filling Information
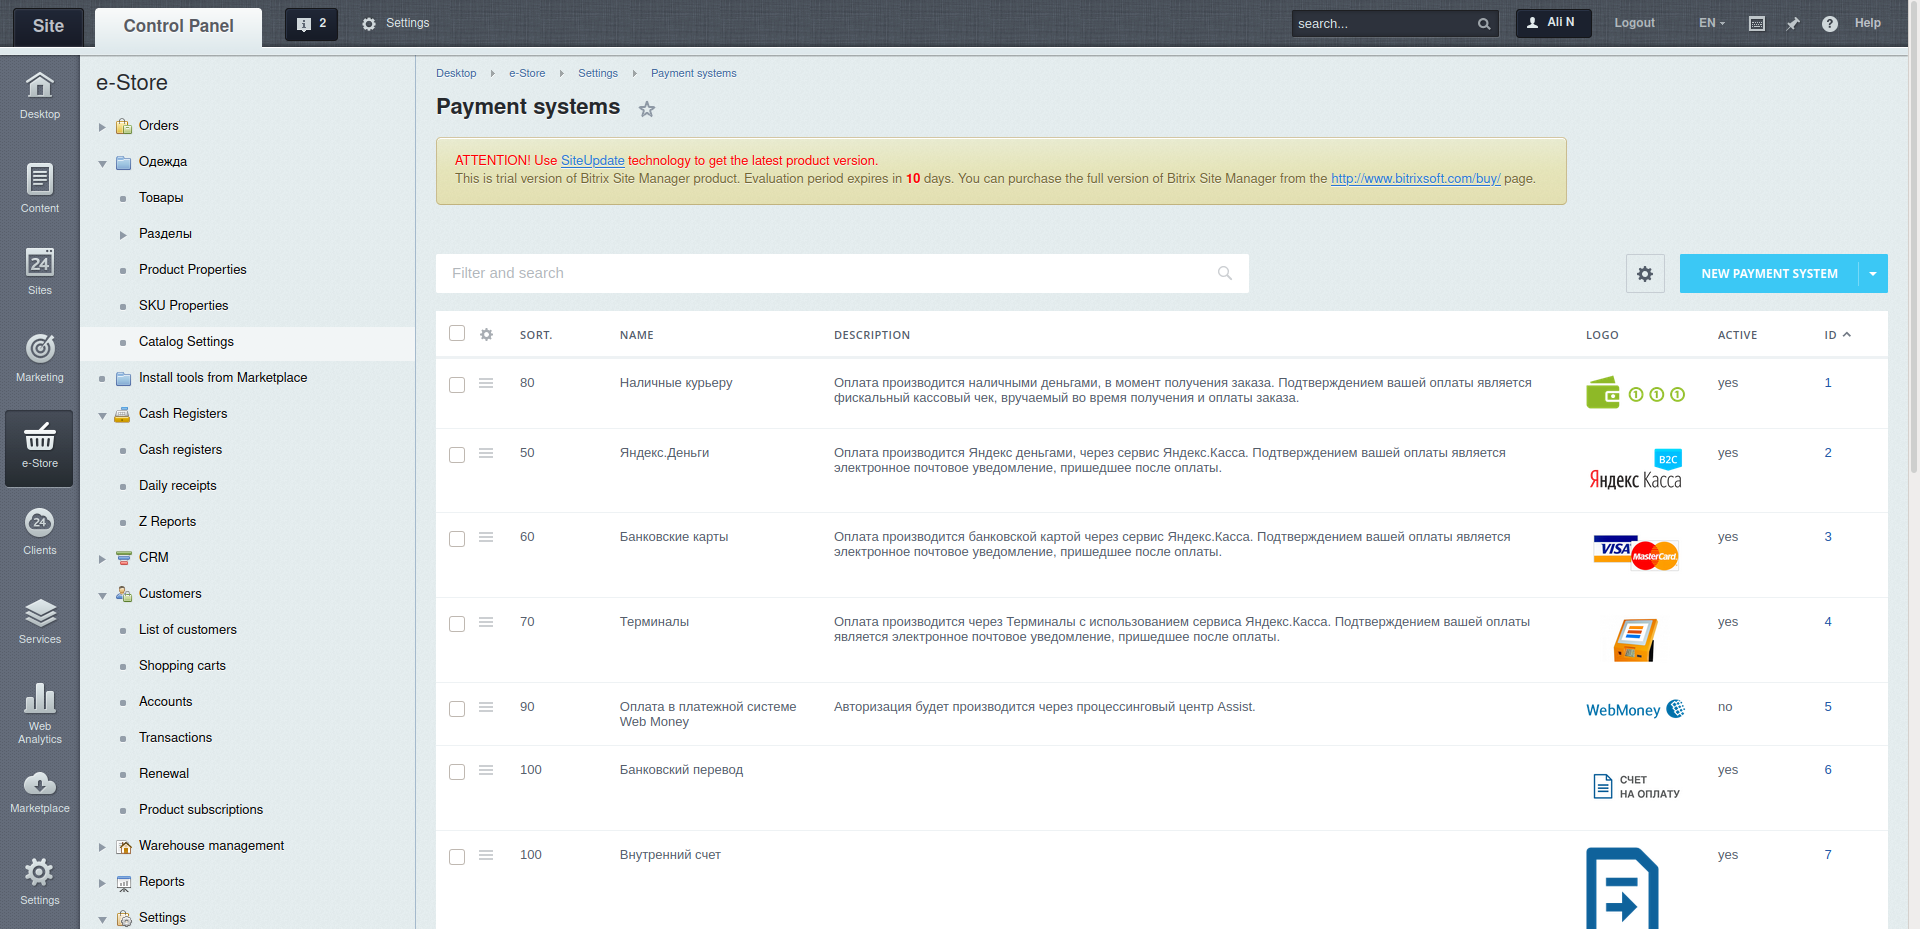
- Log in to 1C-Bitrix Admin and navigate to e-Store > Settings > Payment Systems
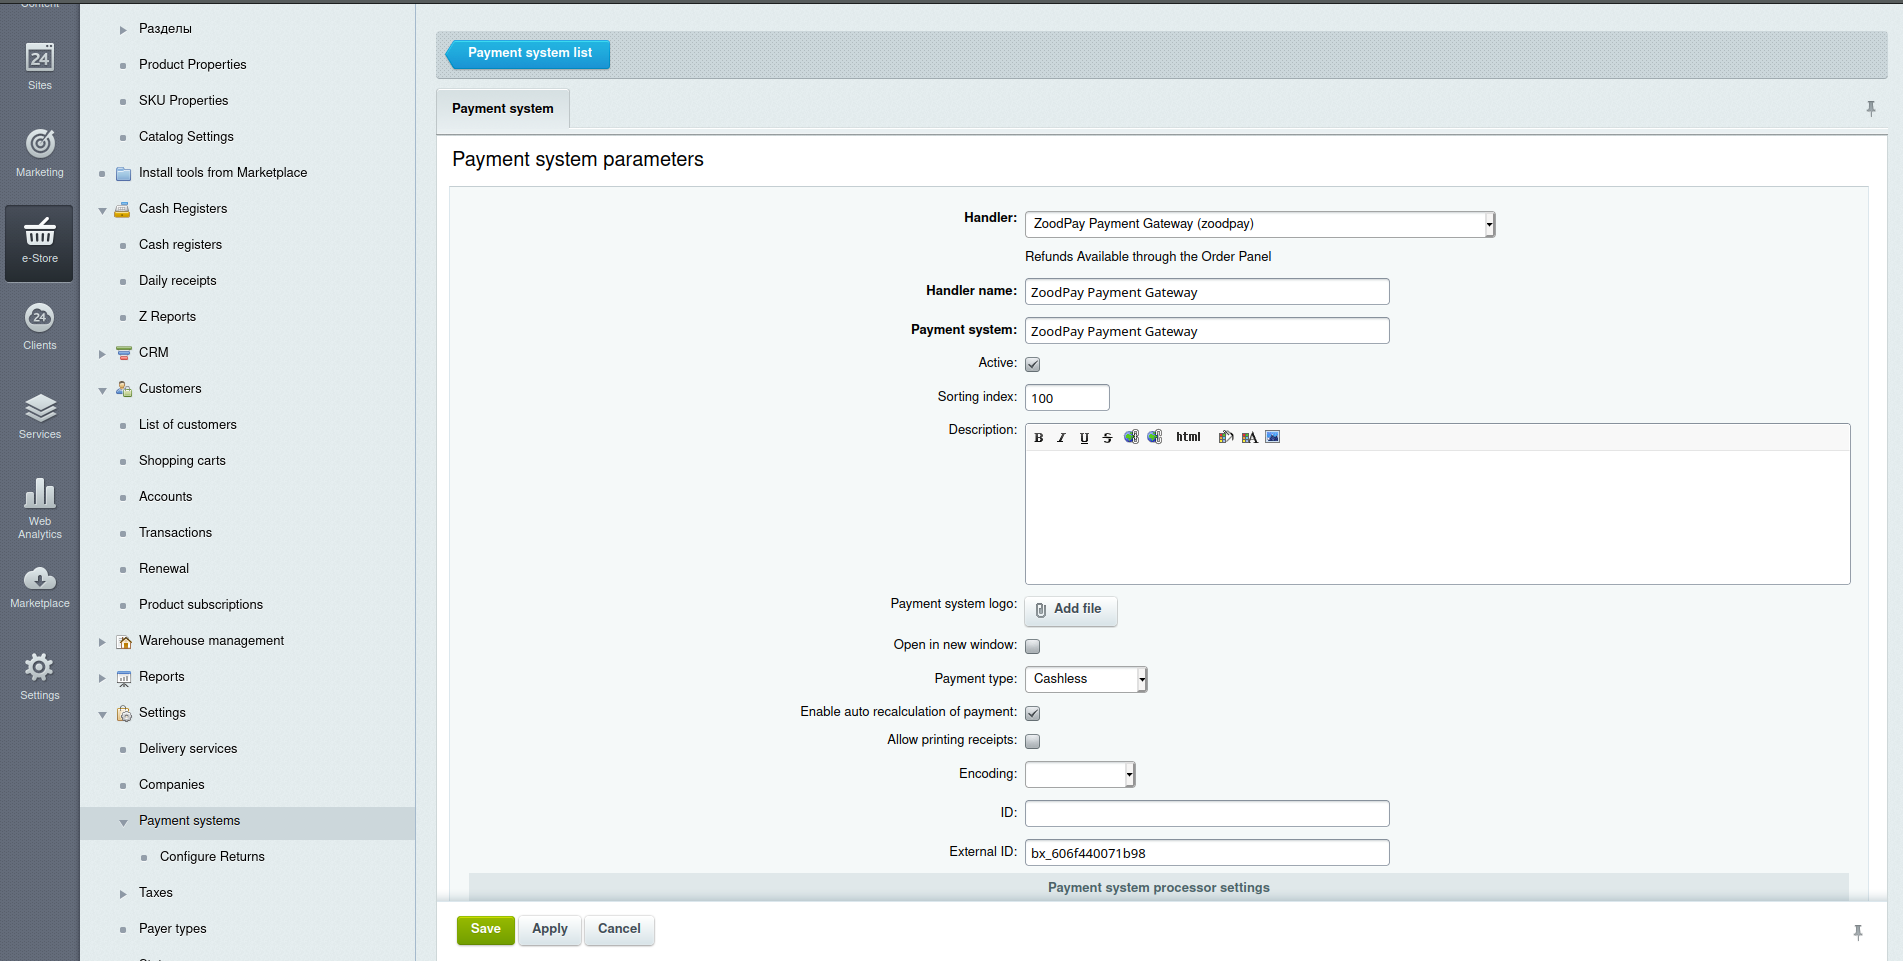
- Click New Payment System
- Handler Drop Down Select ZoodPay Payment Gateway
- Select the Enable for enabling ZoodPay.
- Set Merchant Key as received from the ZoodPay Business Team.
- Set Merchant Secret Key as received from the ZoodPay Business Team.
- Set Merchant Salt Key as received from the ZoodPay Business Team.
- Set API URL as received from the ZoodPay Business Team.
- Check the API HealthCheck, to verify the API HEALTH
- Set the Order Status code for each Status
- Select the Country that Merchant Belong to
- Select the ZoodPay Language interface
- Click Save Changes.
1C-Bitrix Sandbox Testing
- In the ZoodPay configuration page of your 1c-Bitrix admin, enter the Sandbox API URL, Merchant Key, Merchant Secret Key, and Merchant Salt and click save the configuration, check the fetch the configuration
- On your website, add an item to the cart, then proceed to Checkout and select ZoodPay as the payment method and choose an available option.
- Click Place Order, and you should be redirected to the ZoodPay UI page.
- Follow instruction that provided on ZoodPay UI to Complete Order.
- After the payment is completed on ZoodPay UI, you should be redirected back to your website and see a successful payment page.
- Sandbox testing is complete. and you can verify the test order from the ZoodPay Merchant Dashboard
1C-Bitrix Live Checkout
- In the ZoodPay configuration page of your 1c-Bitrix admin, enter the Sandbox API URL, Merchant Key, Merchant Secret Key, and Merchant Salt and click save the configuration, check the fetch the configuration
- On your website, add an item to the cart, then proceed to Checkout and select ZoodPay as the payment method and choose an available option.
- Click Place Order, and you should be redirected to the ZoodPay UI page.
- If you are redirected to the ZoodPay Payment UI, your integration is complete. Congratulations!
- Warning Don’t complete the payment. Your checkout is now live, so you will be charged if you complete.
Troubleshooting
If testing was unsuccessful, review the following:
- Check that ZoodPay 1C-Bitrix extension is the most updated version.
- ZoodPay extension is activated.
- In the 1c-Bitrix admin site, navigate to e-Store > Settings > Payment Systems and ensure the ZoodPay Buy Now Pay Later is Enabled.
- Merchant Key was entered correctly.
- Merchant Secret Key was entered correctly.
- Merchant Salt Key was entered correctly.
- API URL was entered correctly.
- Check API HEALTH
- Fetch Configuration
Uninstall Steps
- in the 1c-Bitrix admin site, navigate to e-Store > Settings > Payment Systems and ensure the ZoodPay Buy Now Pay Later is Disabled and click Delete.
- in the 1c-Bitrix admin site, navigate to MarketPlace > Installed Solutions and click Delete the ZoodPay Buy Now Pay Later.
What to do if I need any help?
- Please write your issue/query to [email protected] .
PrestaShop Extension
This guide describes how to integrate ZoodPay into your PrestaShop website so that you can provide ZoodPay as a payment option for your customers. After integrating with ZoodPay, your PrestaShop site will:
- Offer ZoodPay as a payment option on the checkout page.
- Refund ZoodPay payments from your PrestaShop ZoodPay management system.
Integration Steps
- Install and configure the ZoodPay PrestaShop extension
- Sandbox Testing
- PrestaShop Live Checkout
Required Steps Before Integration
- You should have a ZoodPay Merchant account.
- Please visit our Contact Page if you don’t have an account.
- Make sure you have the following details from ZoodPay.
- Merchant Key
- Merchant Secret
- Merchant Salt
- ZoodPay API URL
- Familiarize yourself with the Transaction Flow of ZoodPay.
Install the ZoodPay PrestaShop Extension
- Download the copy of ZoodPay PrestaShop Extension Package from GitHub
- Log in to your website’s PrestaShop admin.
- Ex: your-website.com/admin
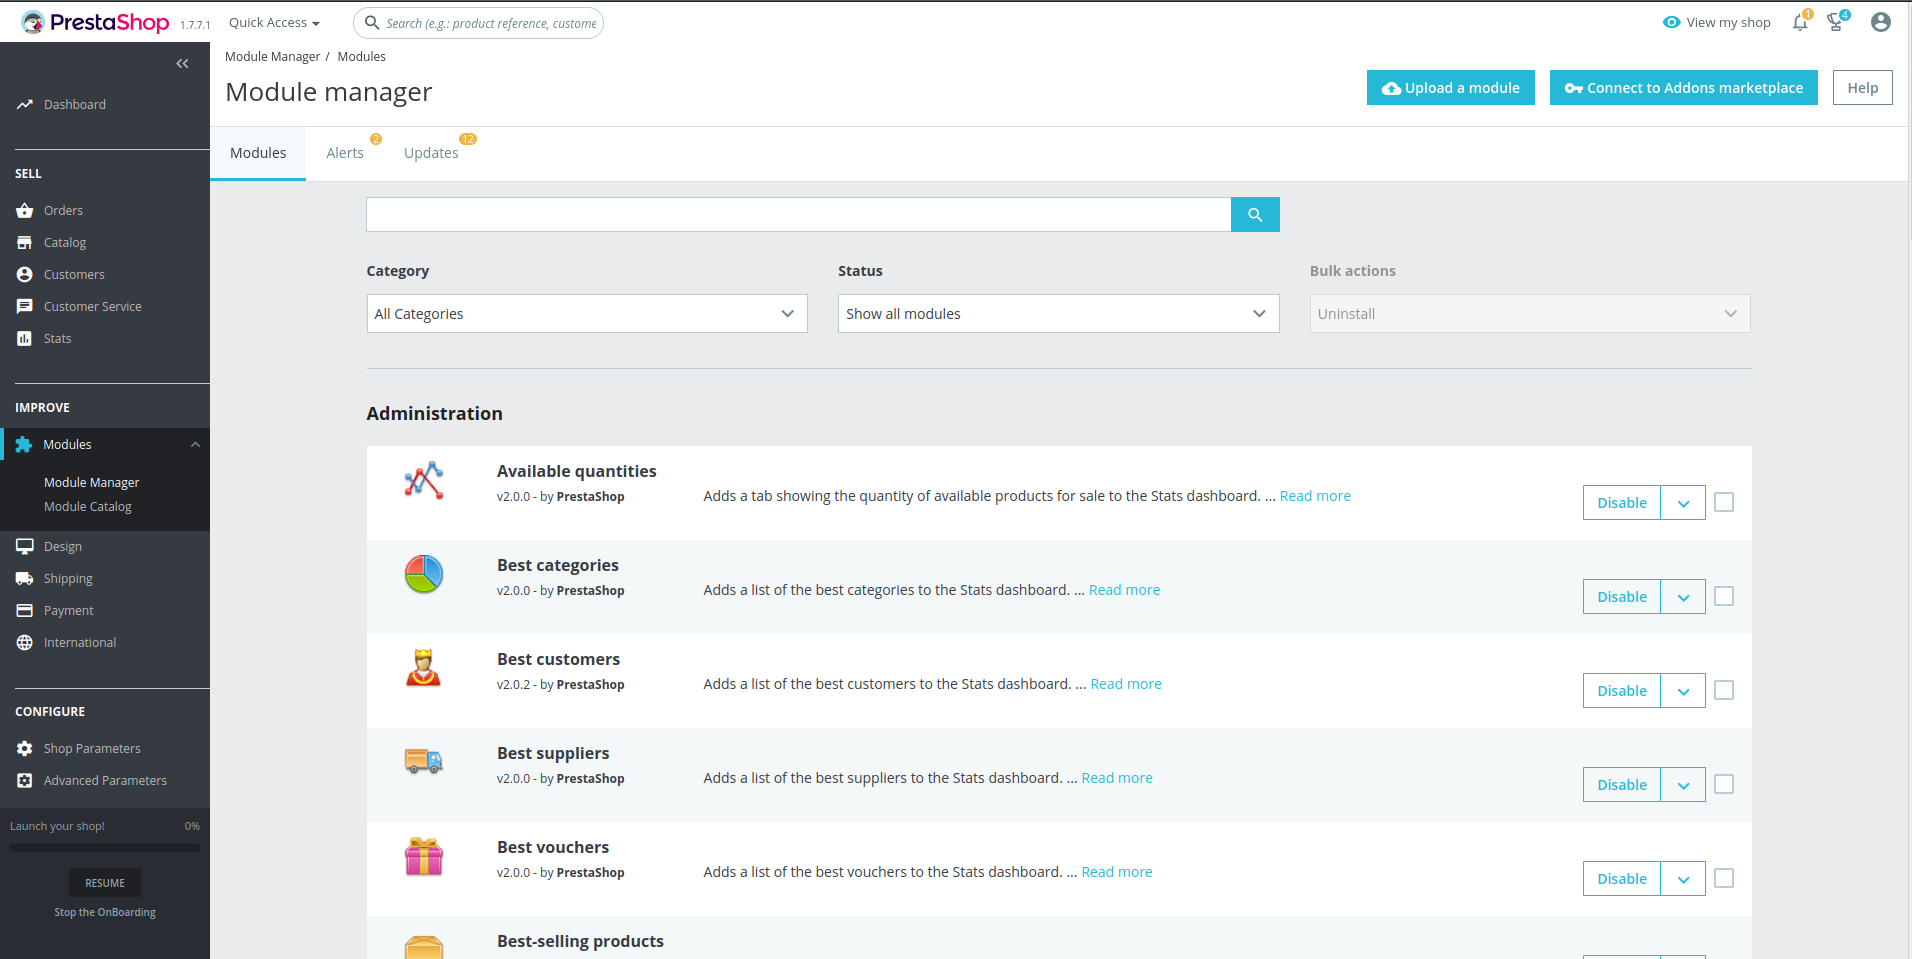
- In the left sidebar, Navigate to Modules > Modules Manager.
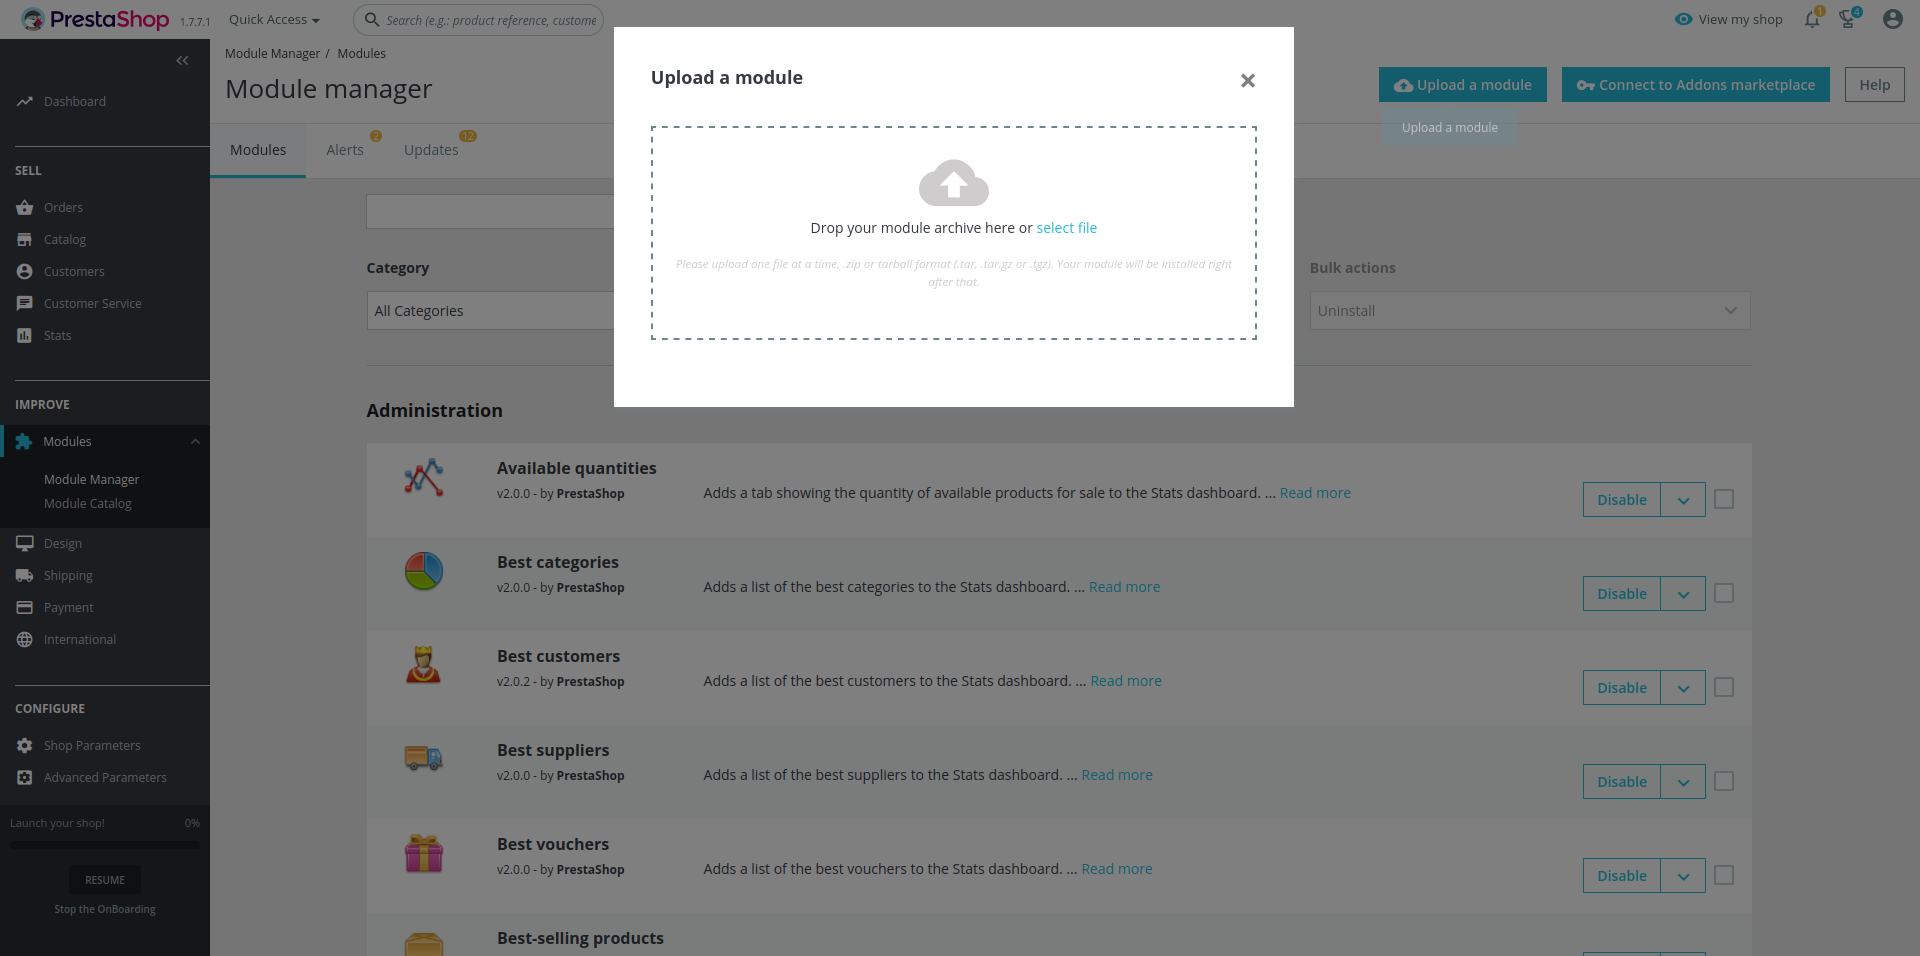
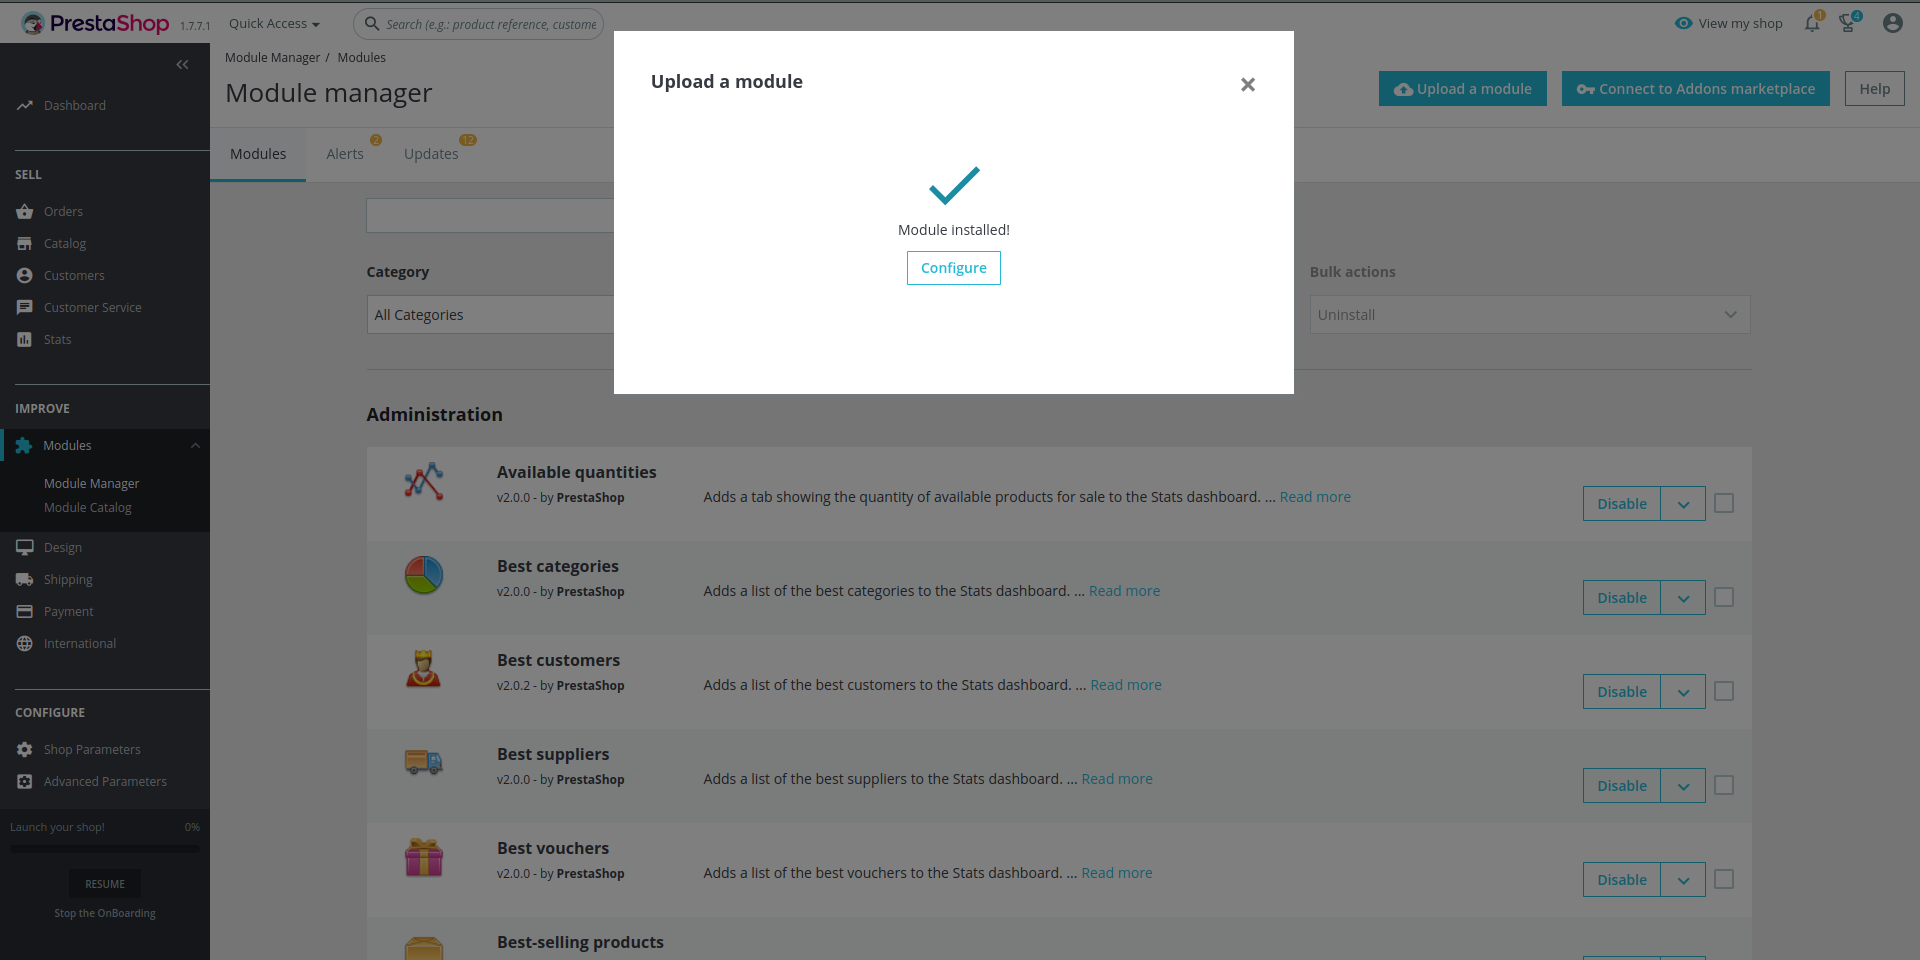
- Click Upload New
- Locate the File that you Downloaded Earlier.
- Verify that ZoodPay Module Installed
Manual Installation
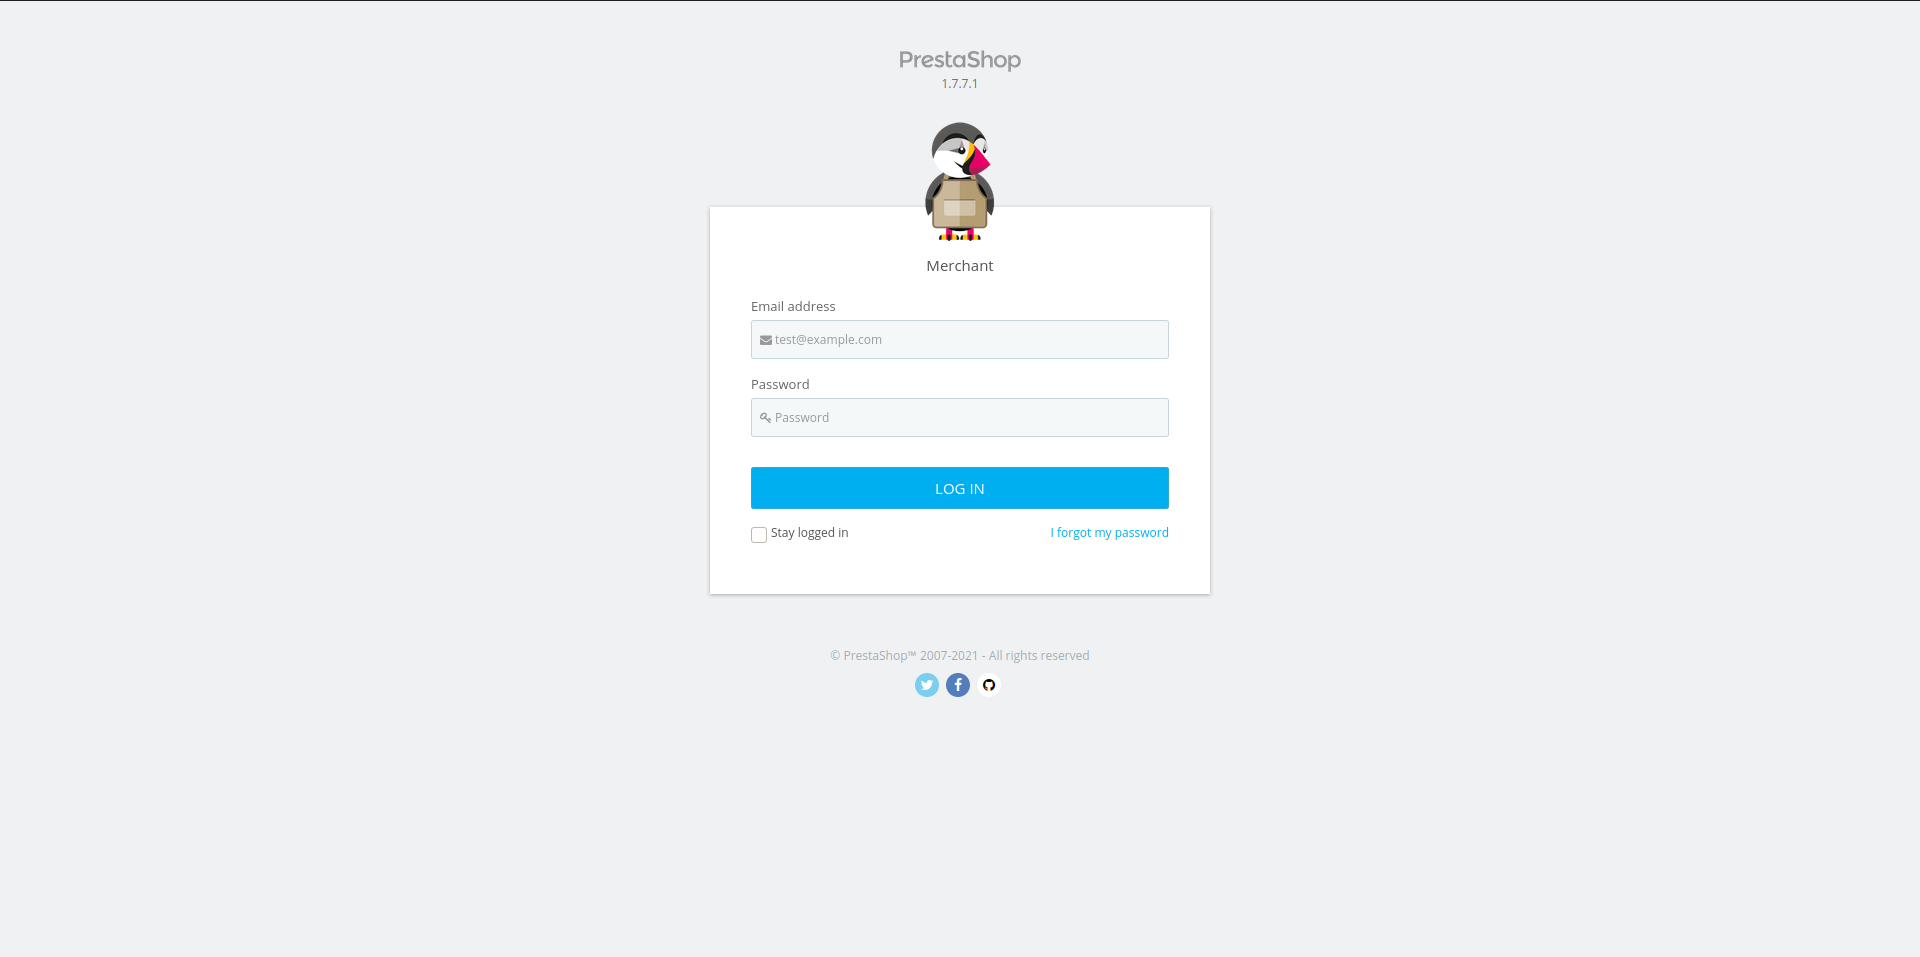
- Log in to your website’s PrestaShop admin.
- Ex: your-website.com/admin
- In the left sidebar, Navigate to Modules > Modules Manager.
- Connect to the Addon Market Place
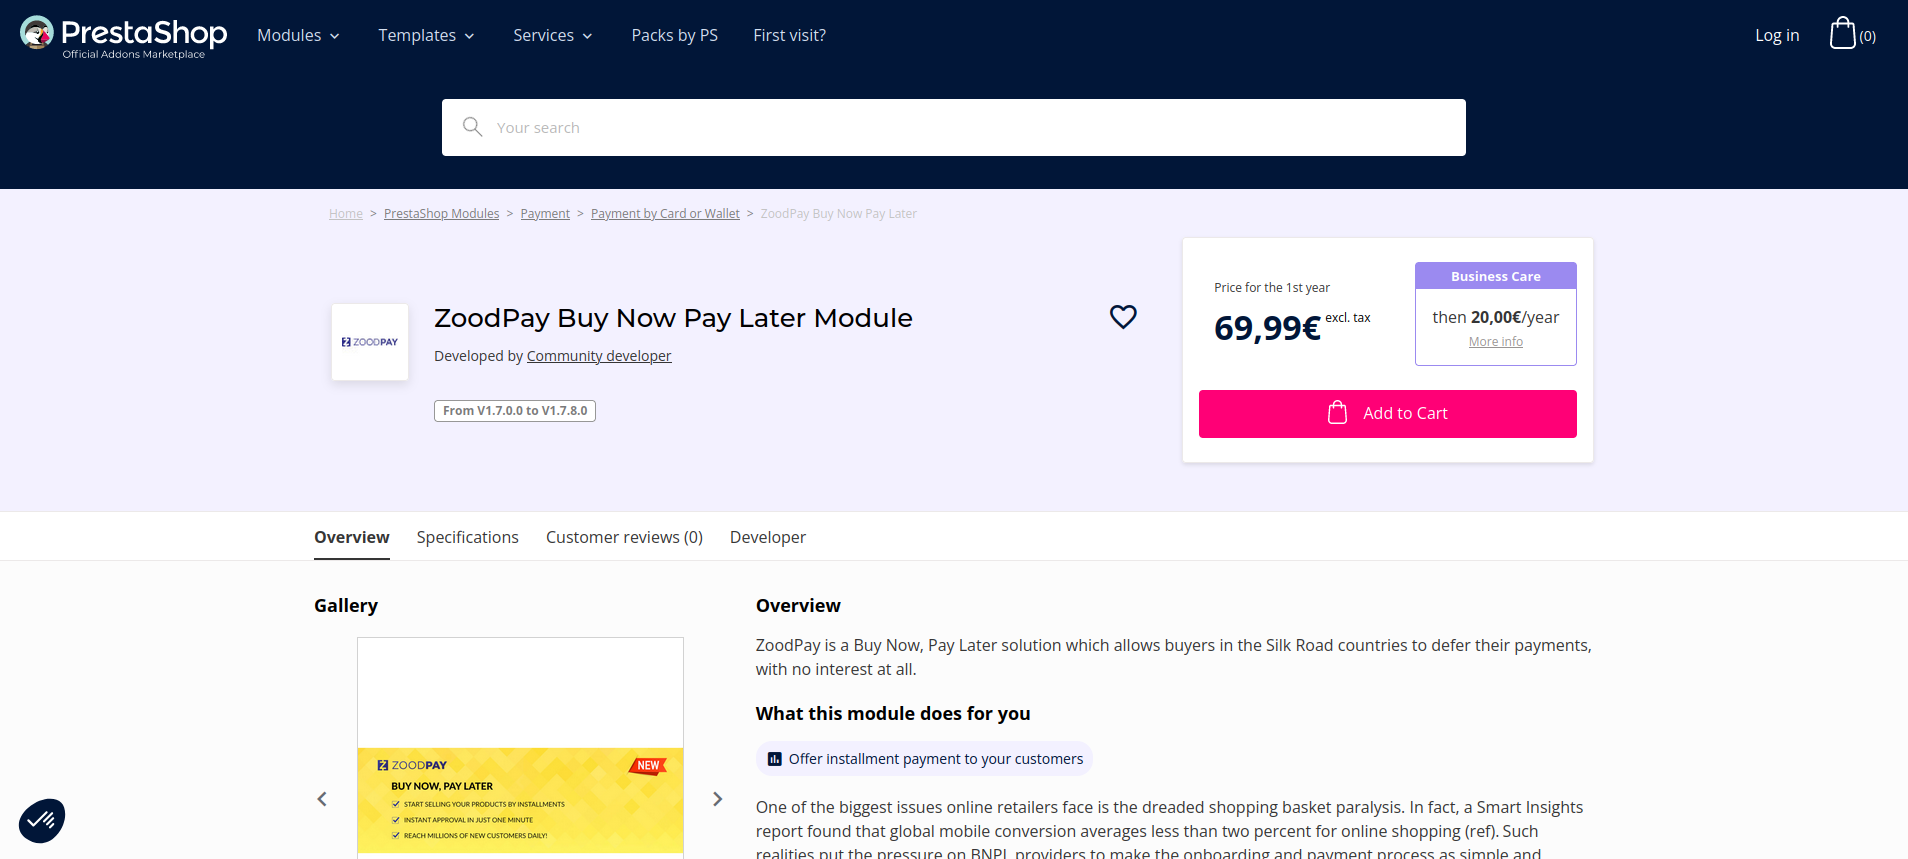
- Purchase ZoodPay Payment Module From PrestaShop Addon Market Place
- Install it from Module Manager Under Selection
- Verify that ZoodPay Module Installed
Automatic Installation
Admin Configuration
- In the left sidebar, Navigate to Modules > Modules Manager.
- Find ZoodPay Module
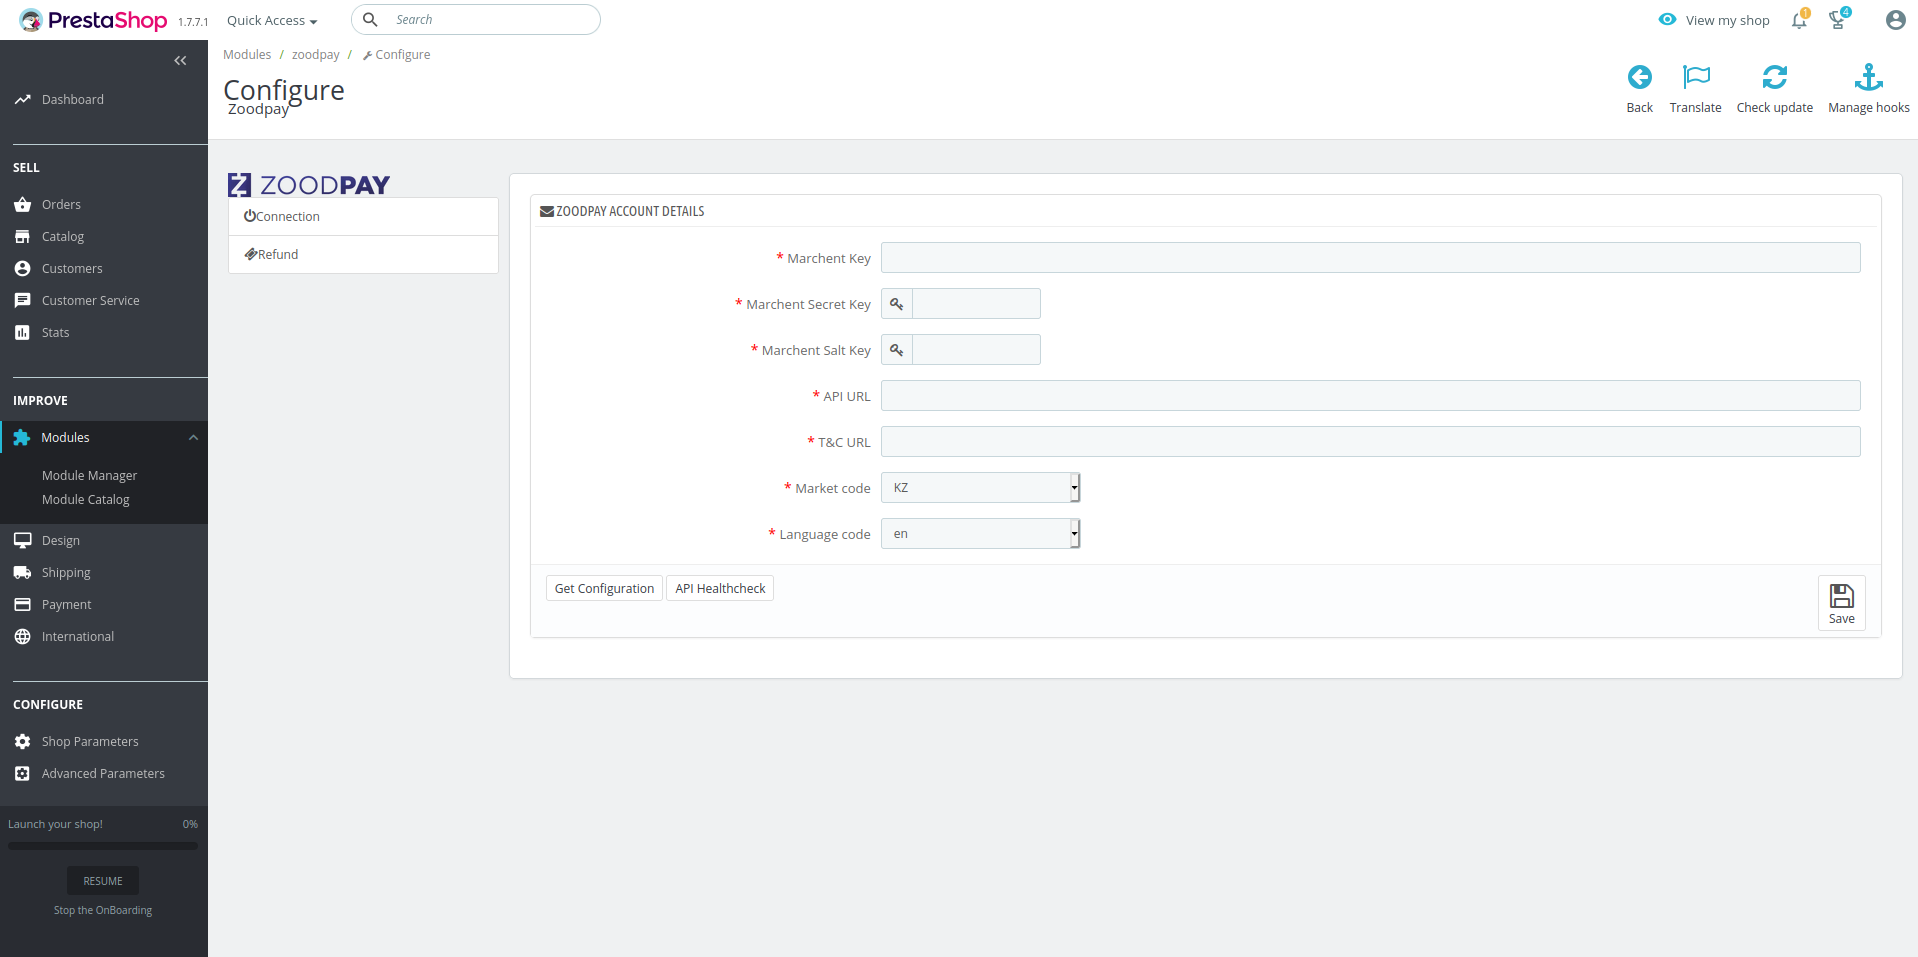
- Click the Configure
- Set Merchant Key as received from the ZoodPay Business Team.
- Set Merchant Secret Key as received from the ZoodPay Business Team.
- Set Merchant Salt Key as received from the ZoodPay Business Team.
- Set API URL as received from the ZoodPay Business Team.
- Select Market Code Based on your Country.
- Select Language Code Based on your Preference.
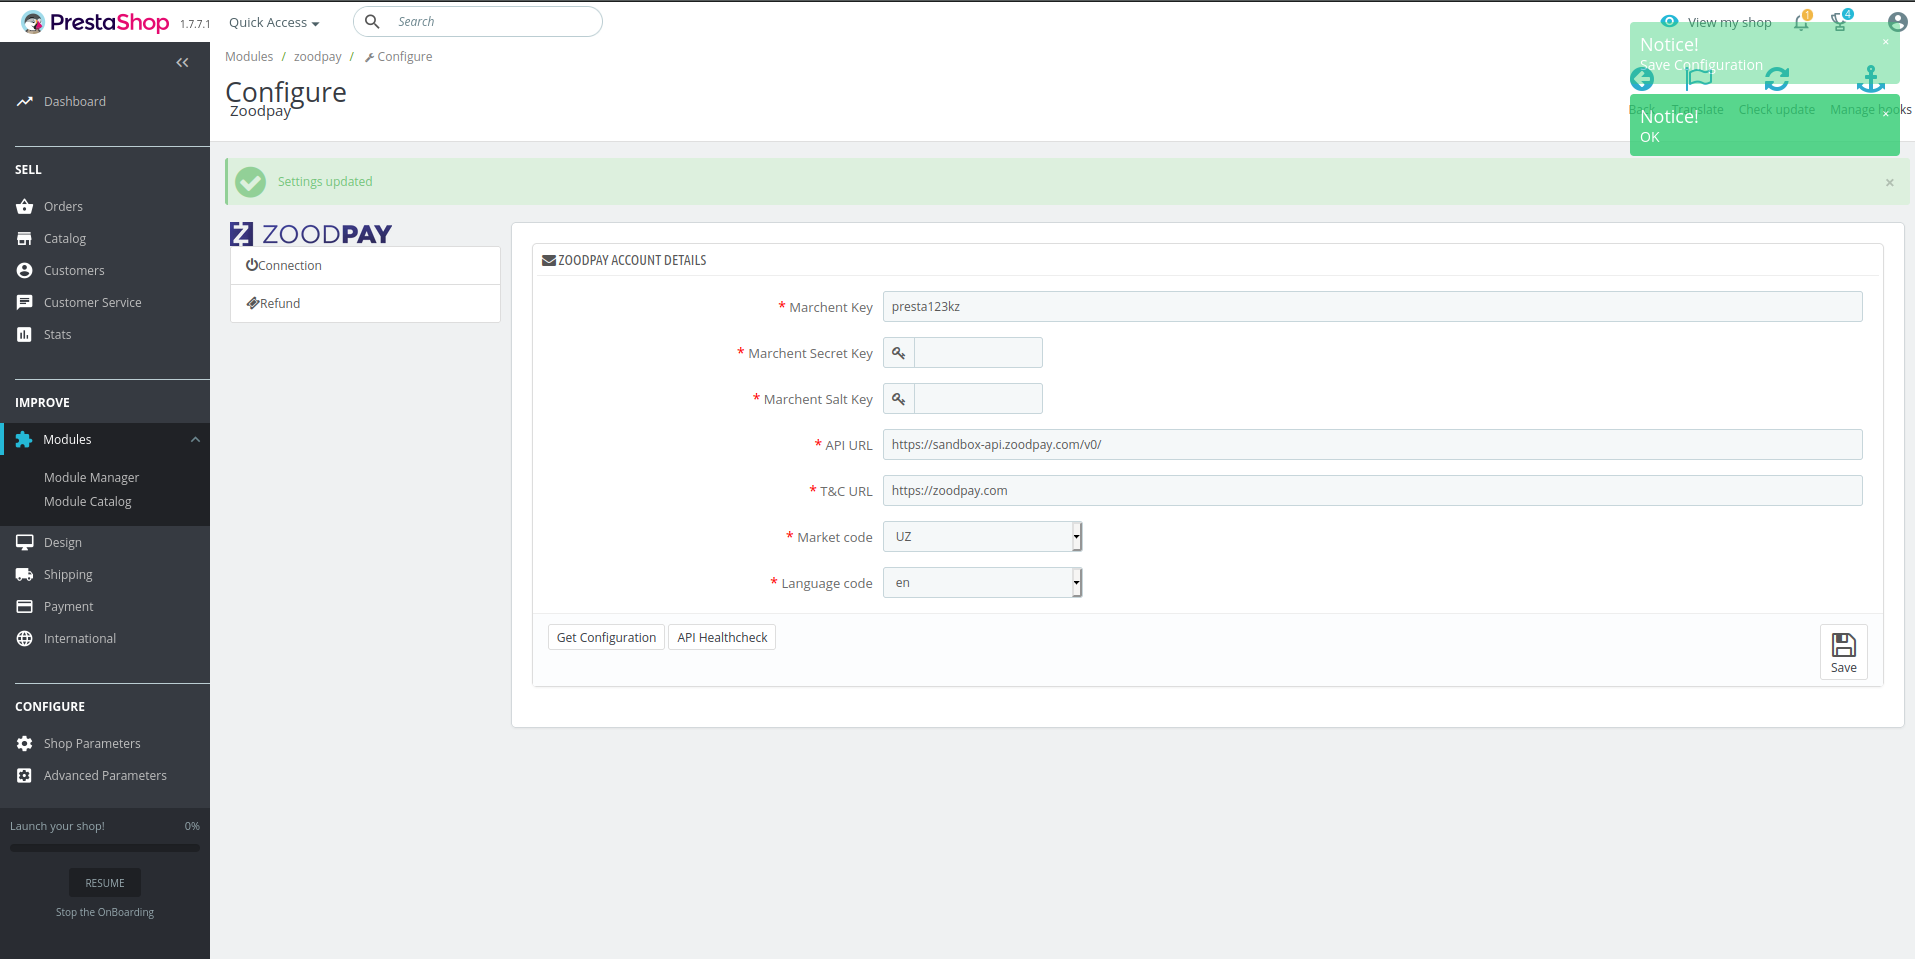
- Click Save Changes.
- Verify API Health
- Click on the API HealthCheck, to verify the API HEALTH
- Click Fetch Configuration
PrestaShop Sandbox Testing
- In the ZoodPay configuration page of your PrestaShop admin, enter the Sandbox API URL, Merchant Key, Merchant Secret Key, and Merchant Salt and click save the information and afterwards fetch the configuration
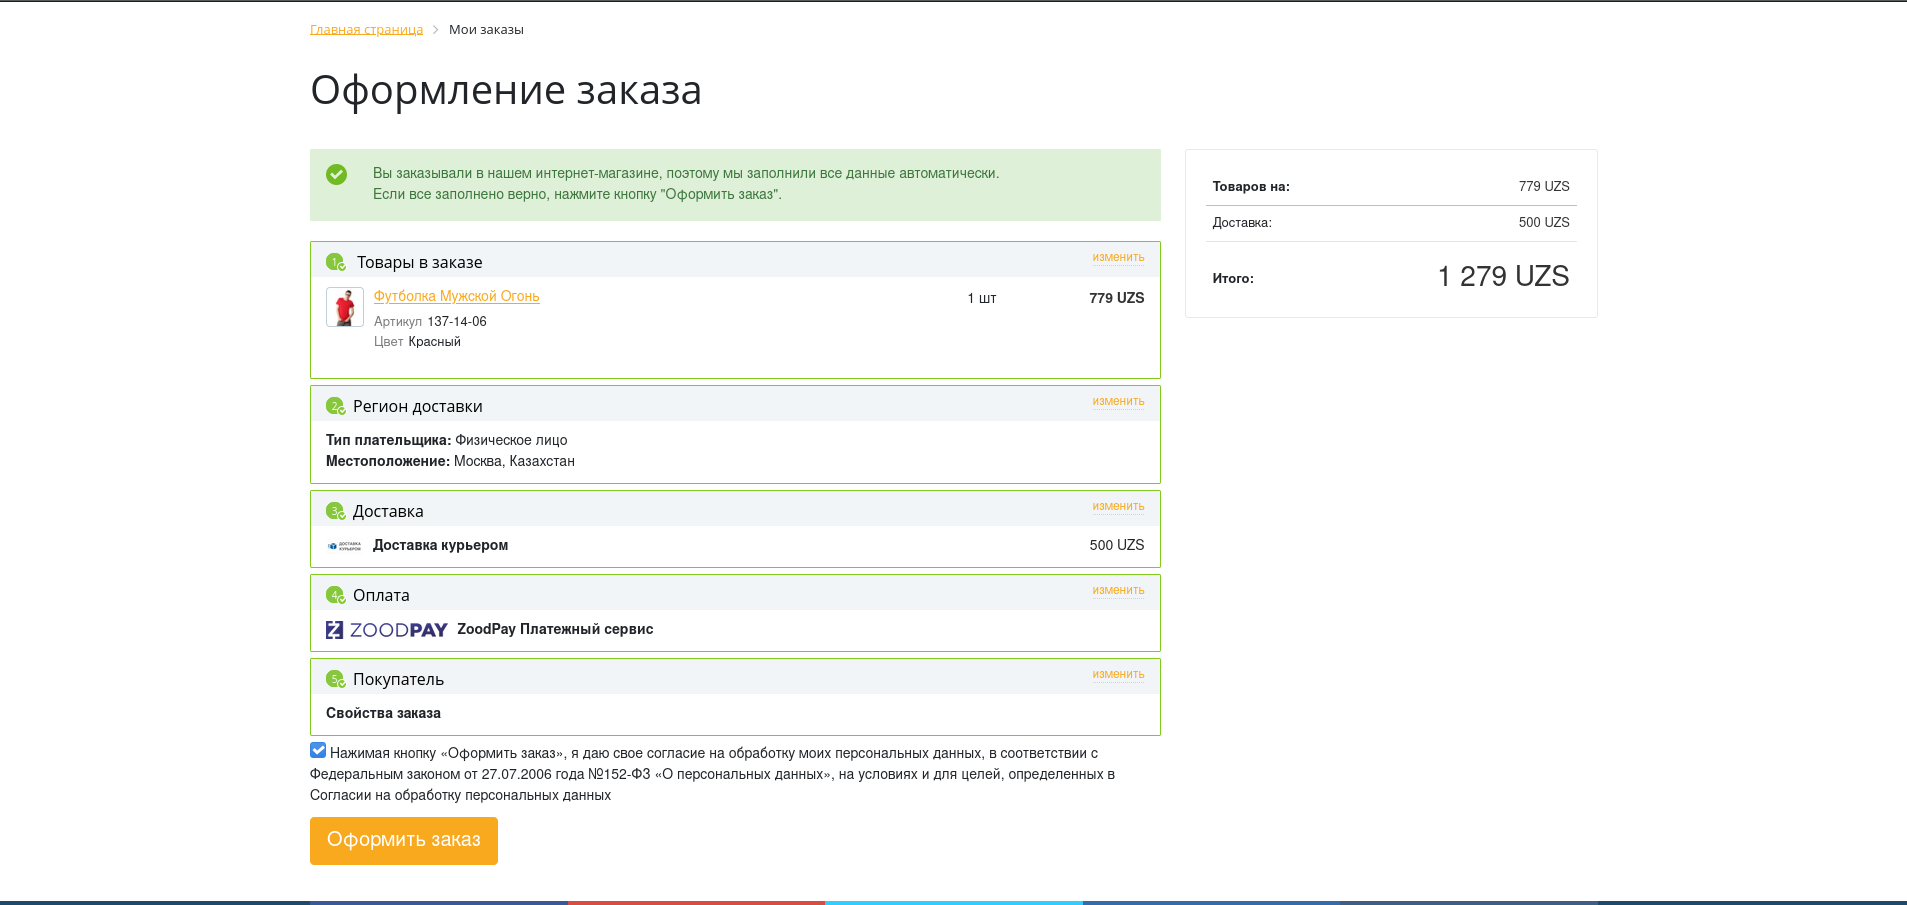
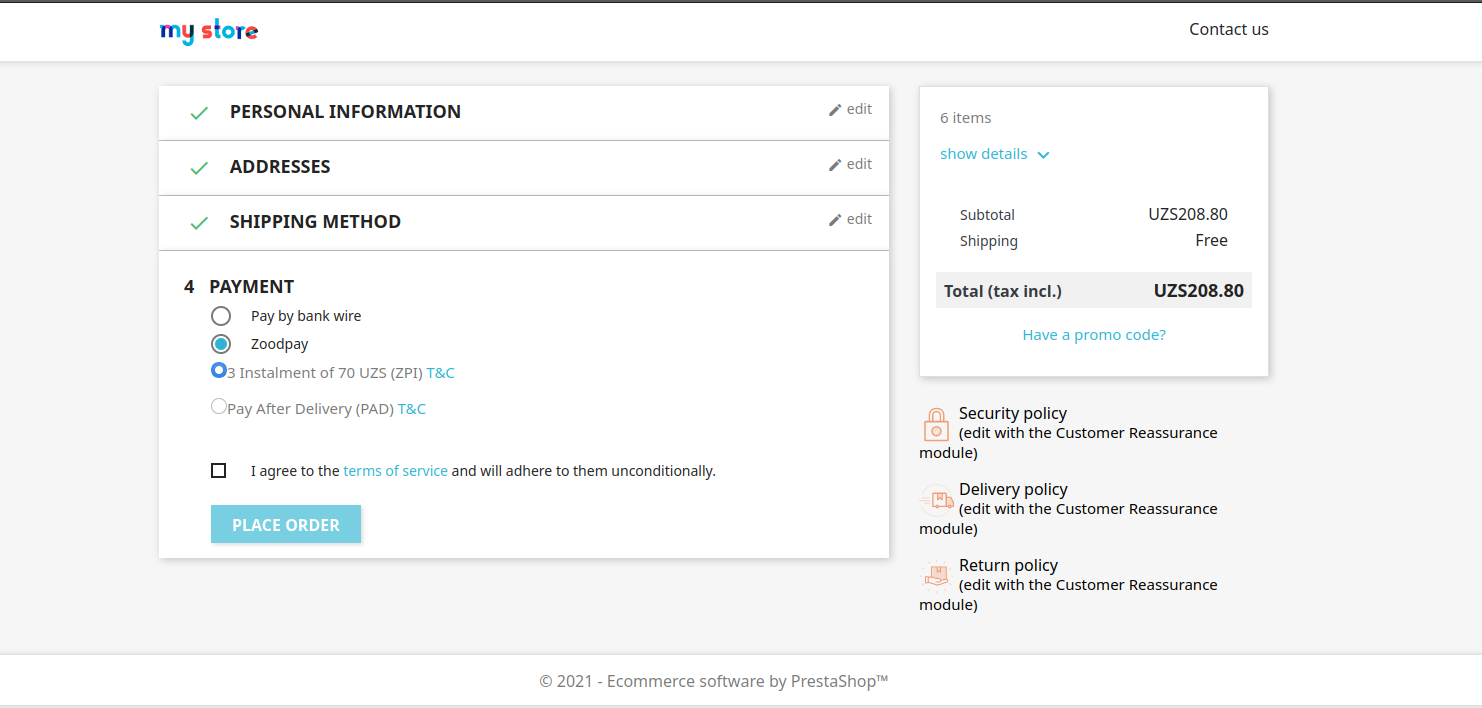
- On your website, add an item to the cart, then proceed to Checkout and select ZoodPay as the payment method and choose an available option.
- Click Place Order, and you should be redirected to the ZoodPay UI page.
- Follow instruction that provided on ZoodPay UI to Complete Order.
- After the payment is completed on ZoodPay UI, you should be redirected back to your website and see a successful payment page.
- Sandbox testing is complete. and you can verify the test order from the ZoodPay Merchant Dashboard
PrestaShop Live Checkout
- In the ZoodPay configuration page of your PrestaShop admin, enter the Live API URL, Merchant Key, Merchant Secret Key, and Merchant Salt and click save the information and afterwards fetch the configuration
- On your website, add an item to the cart, then proceed to Checkout and select ZoodPay as the payment method and choose an available option .
- Click Place Order, and you should be redirected to the ZoodPay UI page.
- If you are redirected to the ZoodPay Payment UI, your integration is complete. Congratulations!
- Warning Don’t complete the payment. Your checkout is now live, so you will be charged if you complete.
Troubleshooting
If testing was unsuccessful, review the following:
- Check that ZoodPay PrestaShop extension is the most updated version.
- Go to PrestaShop Admin Page > Module > Module Manager and ensure the addon is enabled.
- Merchant Key was entered correctly.
- Merchant Secret Key was entered correctly.
- Merchant Salt Key was entered correctly.
- API URL was entered correctly.
- Check API HEALTH
- Fetch Configuration
Uninstall Steps
- Go to PrestaShop Admin Page > Module > Module Manager.
- Under ZoodPay Payment Module, click Disable then click Unistall.
What to do if I need any help?
- Please write your issue/query to [email protected] .
Errors
ZoodPay API indicates success or failure of a request via HTTP status codes.
| HTTP Status / Error Code | Error Description | Error Message |
|---|---|---|
| 200-201 | The request was processed successfully. | NA |
| 400 | Bad Request. | Relevant error message will be displayed |
| 401 | Unauthorised. | You are not authenticated to perform the requested action. |
| 404 | Not Found | Resource not found. |
| 500 | Internal Server Error | Please try again. |
| 503 | Service Unavailable | Service Unavailable |
| 504 | Gateway Timeout | Gateway Timeout |